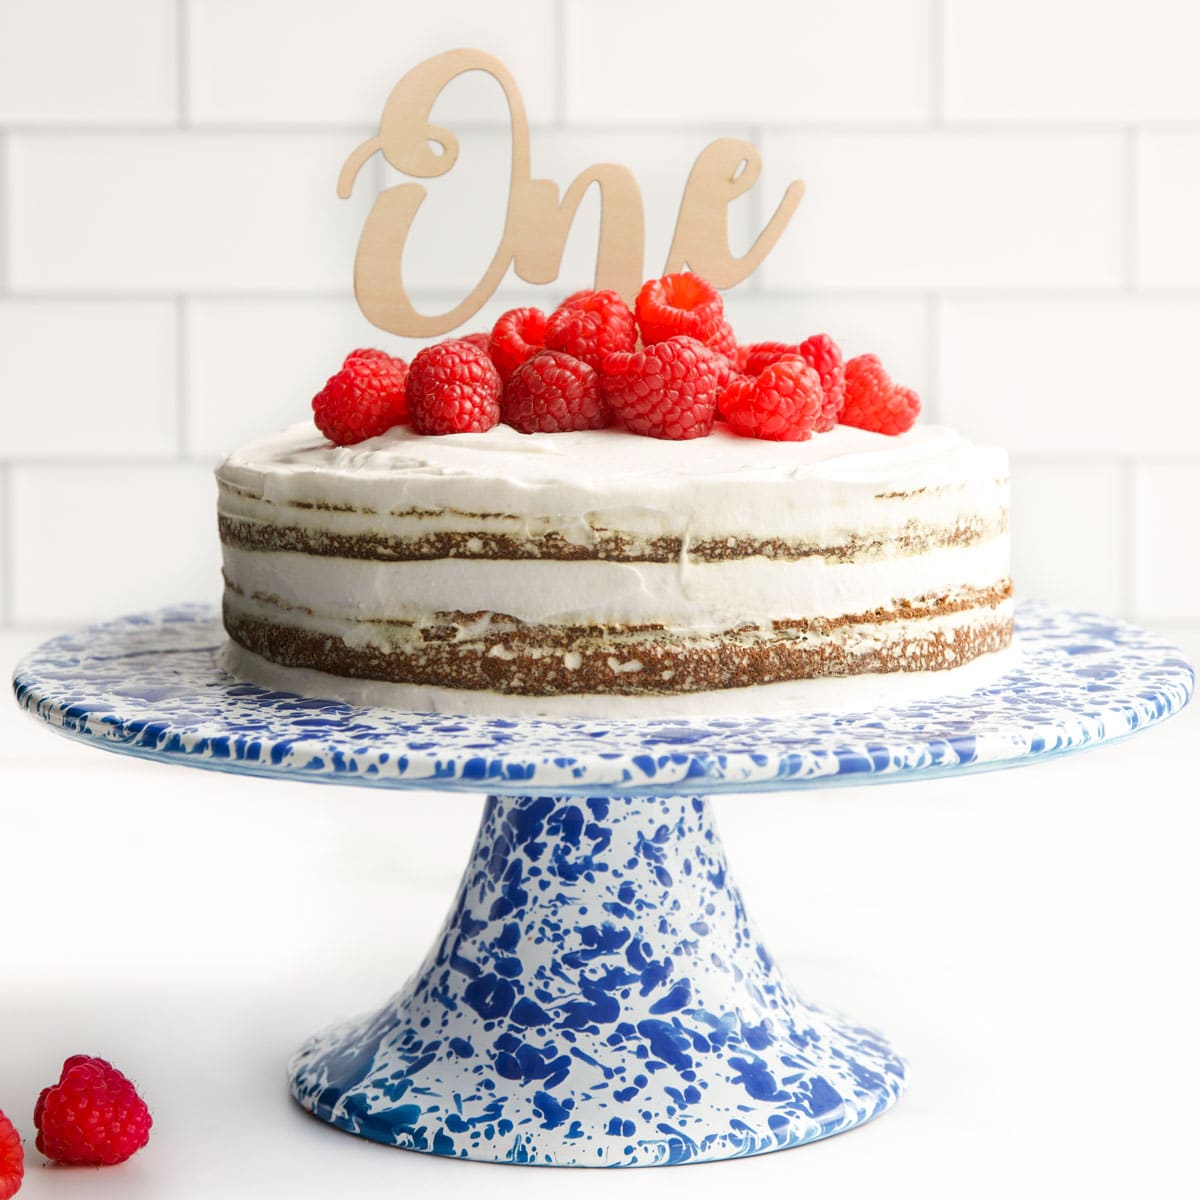
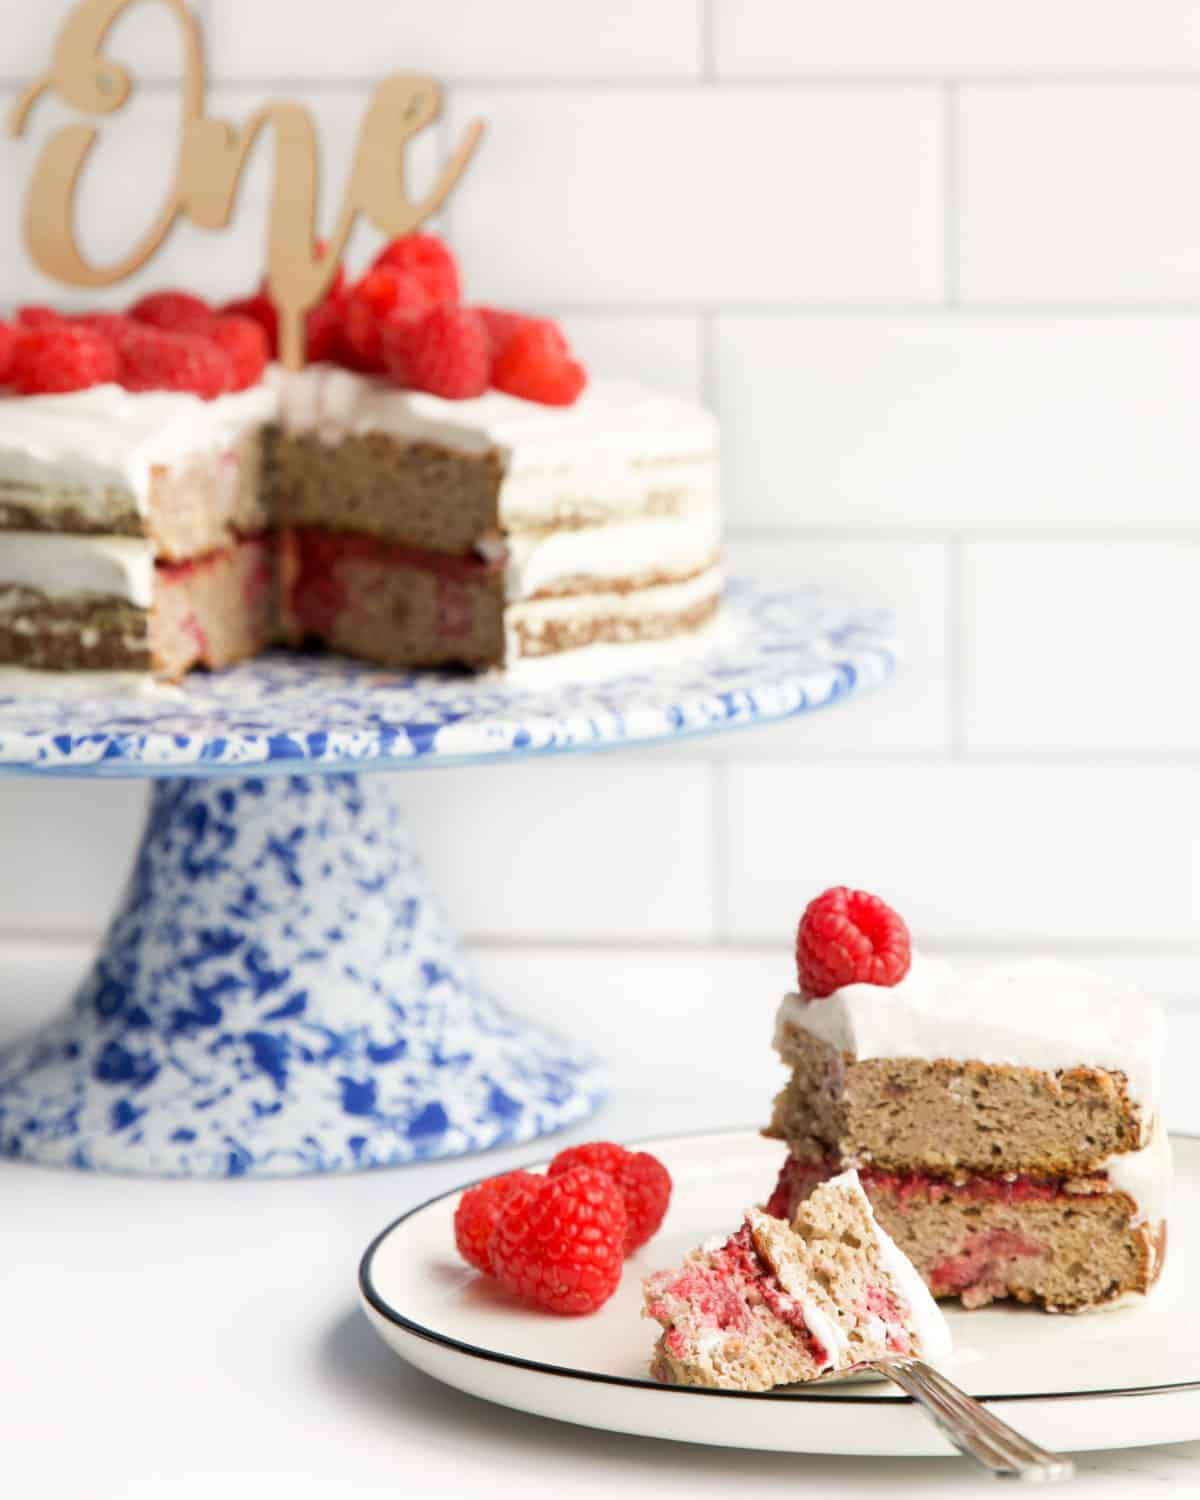
Turning one is a special milestone and you want the perfect cake to celebrate. This Healthy First Birthday Cake is amazingly moist, full of flavour and sweetened only with fruit. It is gluten, dairy and nut-free making it the ideal choice for those with allergies.
Jump to:
- Why Choose This Cake for Your Baby's Special Day?
- Video Tutorial
- Ingredient Information (& Alternative Suggestions)
- Step By Step Instructions and Cooking Tips
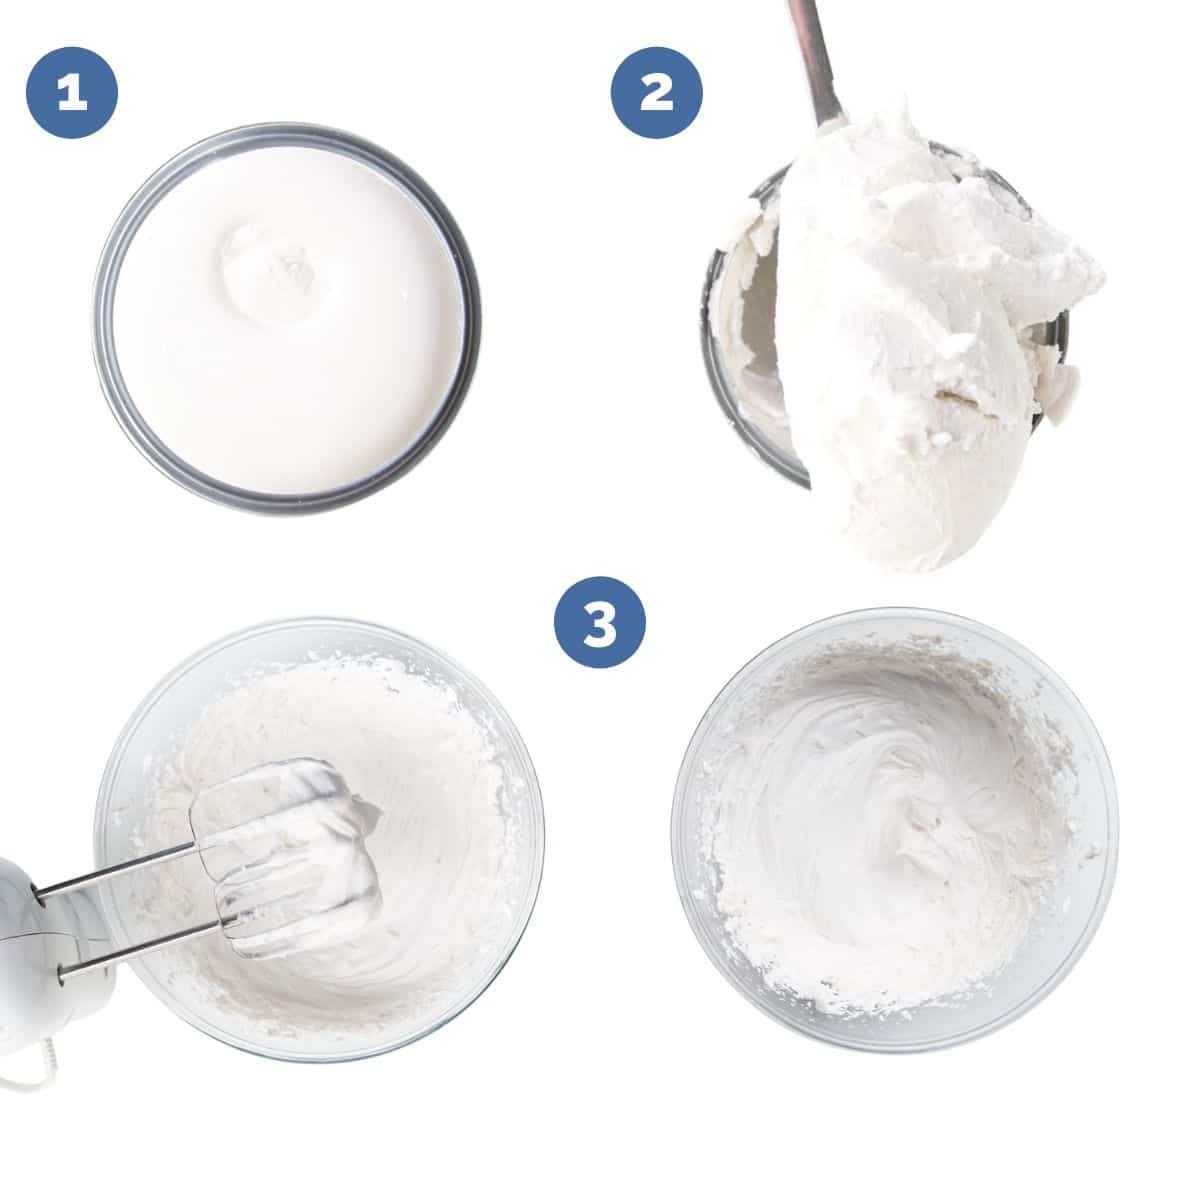
- Top Tips for Making Coconut Whipped Cream
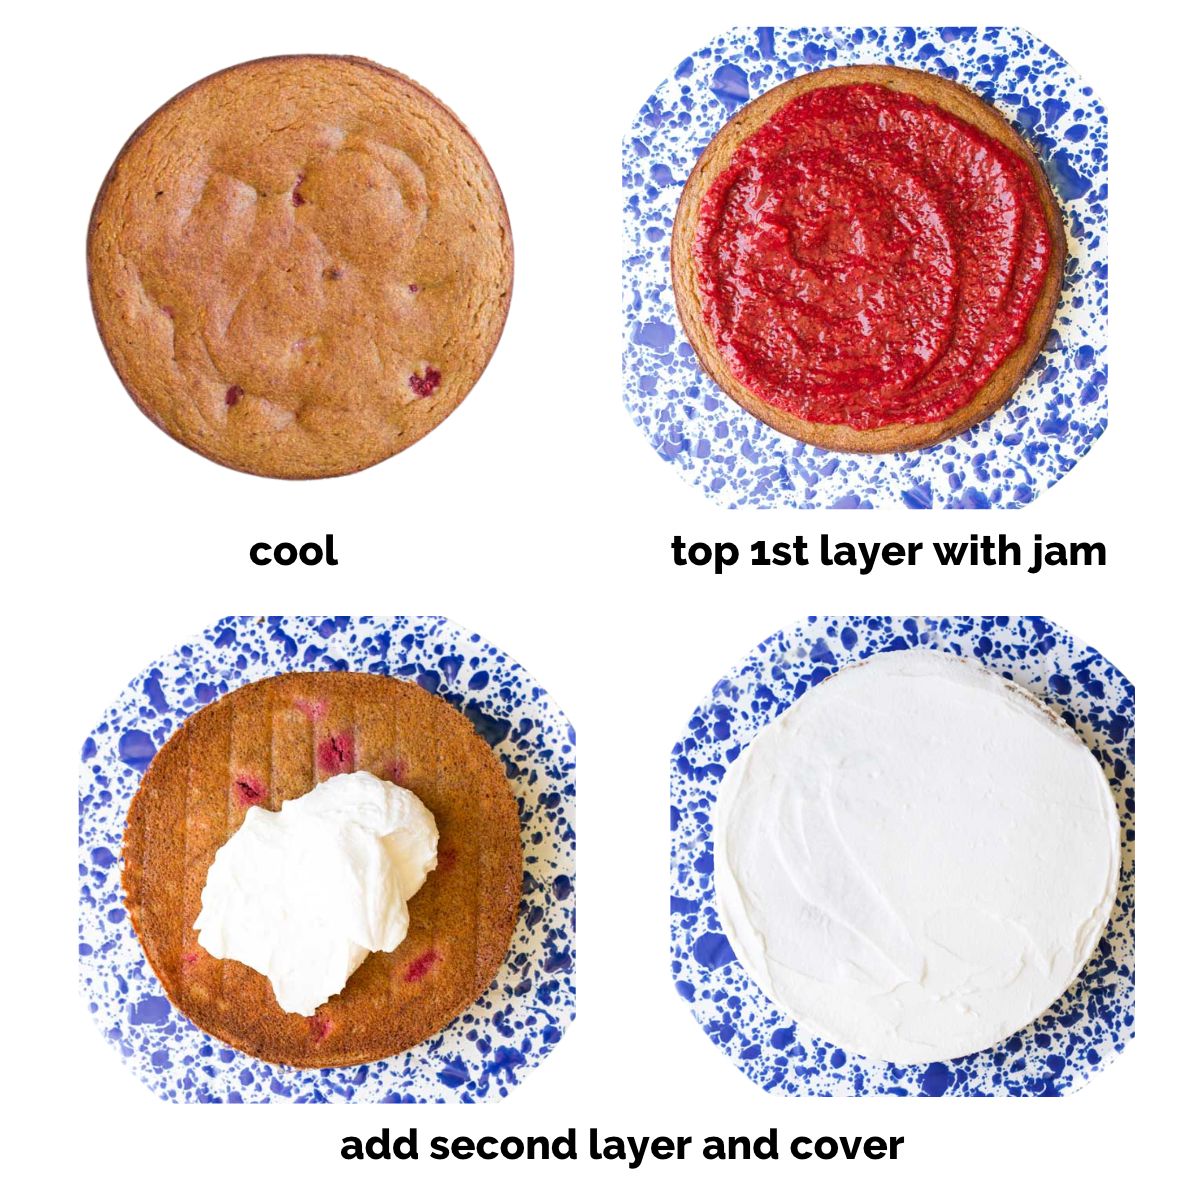
- Assembling the Cake
- Storage and Make-Ahead Instructions
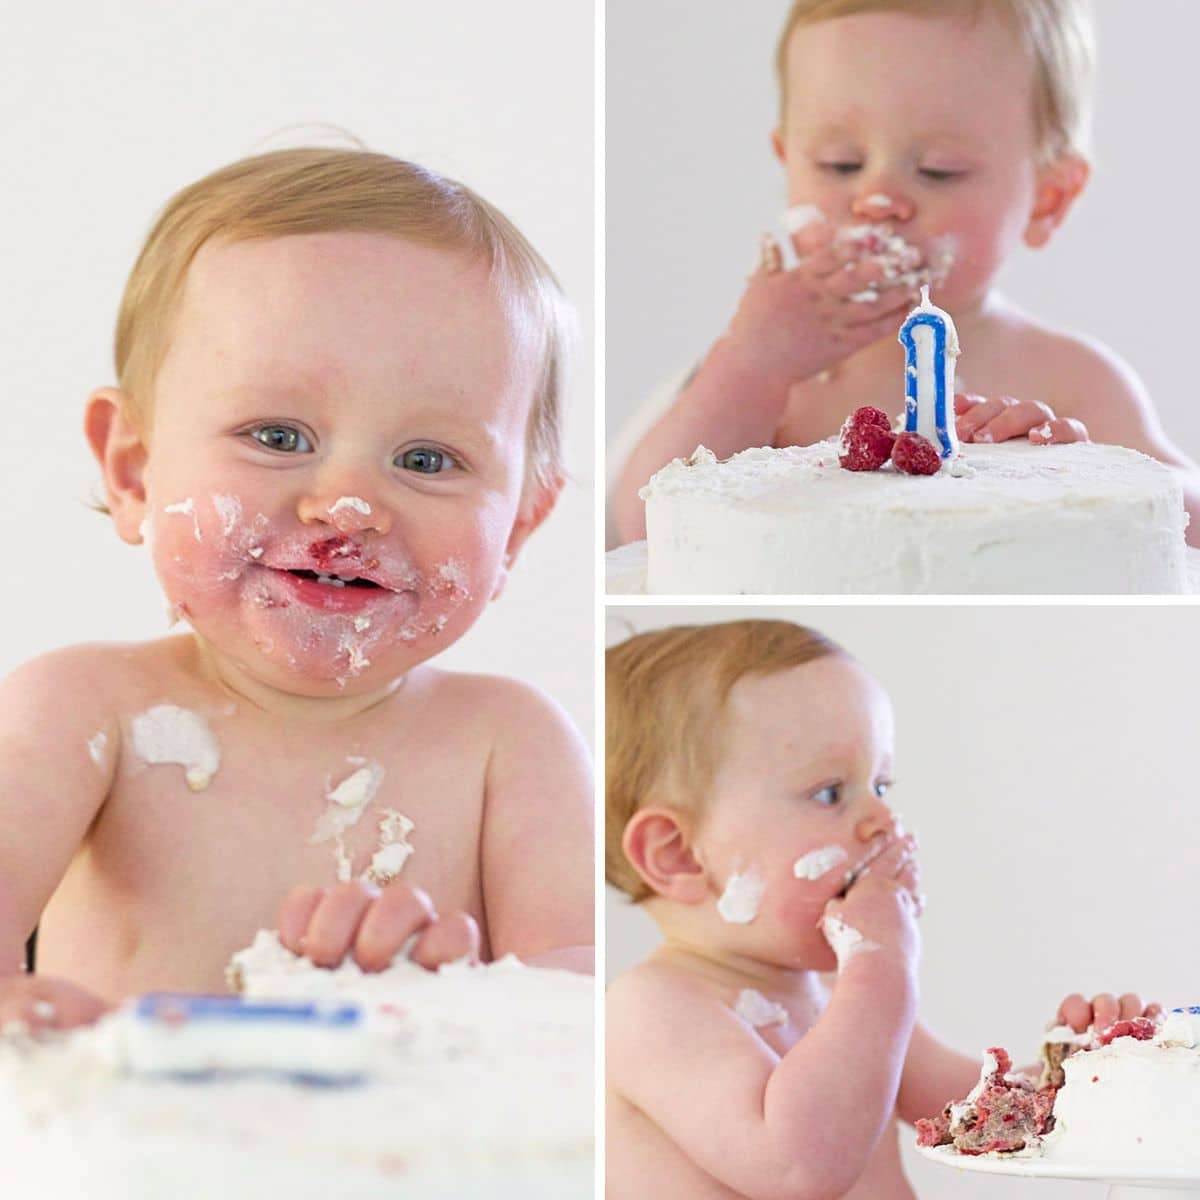
- Does it Make a Good Smash Cake?
- What Others Are Saying...
- Recipe FAQs
- More Fruit Sweetened Recipes
- Healthy First Birthday Cake
Why Choose This Cake for Your Baby's Special Day?
Most parents are careful to fill their little one's tummies with nutrient-dense foods from the moment they start solid food.
The World Health Organisation recommends that children under the age of two consume NO ADDED SUGAR. For this reason, many parents avoid feeding their baby added sugars and when it comes to their baby's first birthday they may feel uncomfortable serving a sugar-laden cake.
I'm not against sugar and believe it is important to find the right balance - where it doesn't take over but covers our children's wants. However, I also believe that you can't miss what you don't know about. A one-year-old baby generally doesn't know any different and serving a cake, sweetened with only fruit, will make most birthday babies more than happy.
The sweetness in this cake comes from the banana and date puree. It is NOT a sugar-free cake, dates are a high sugar ingredient, however, it is lower in sugar than many other cakes and if you wish, you can reduce the number of dates you use.
Video Tutorial
Ingredient Information (& Alternative Suggestions)
For the full recipe, with ingredient amounts, scroll to the recipe card at the bottom of the post.
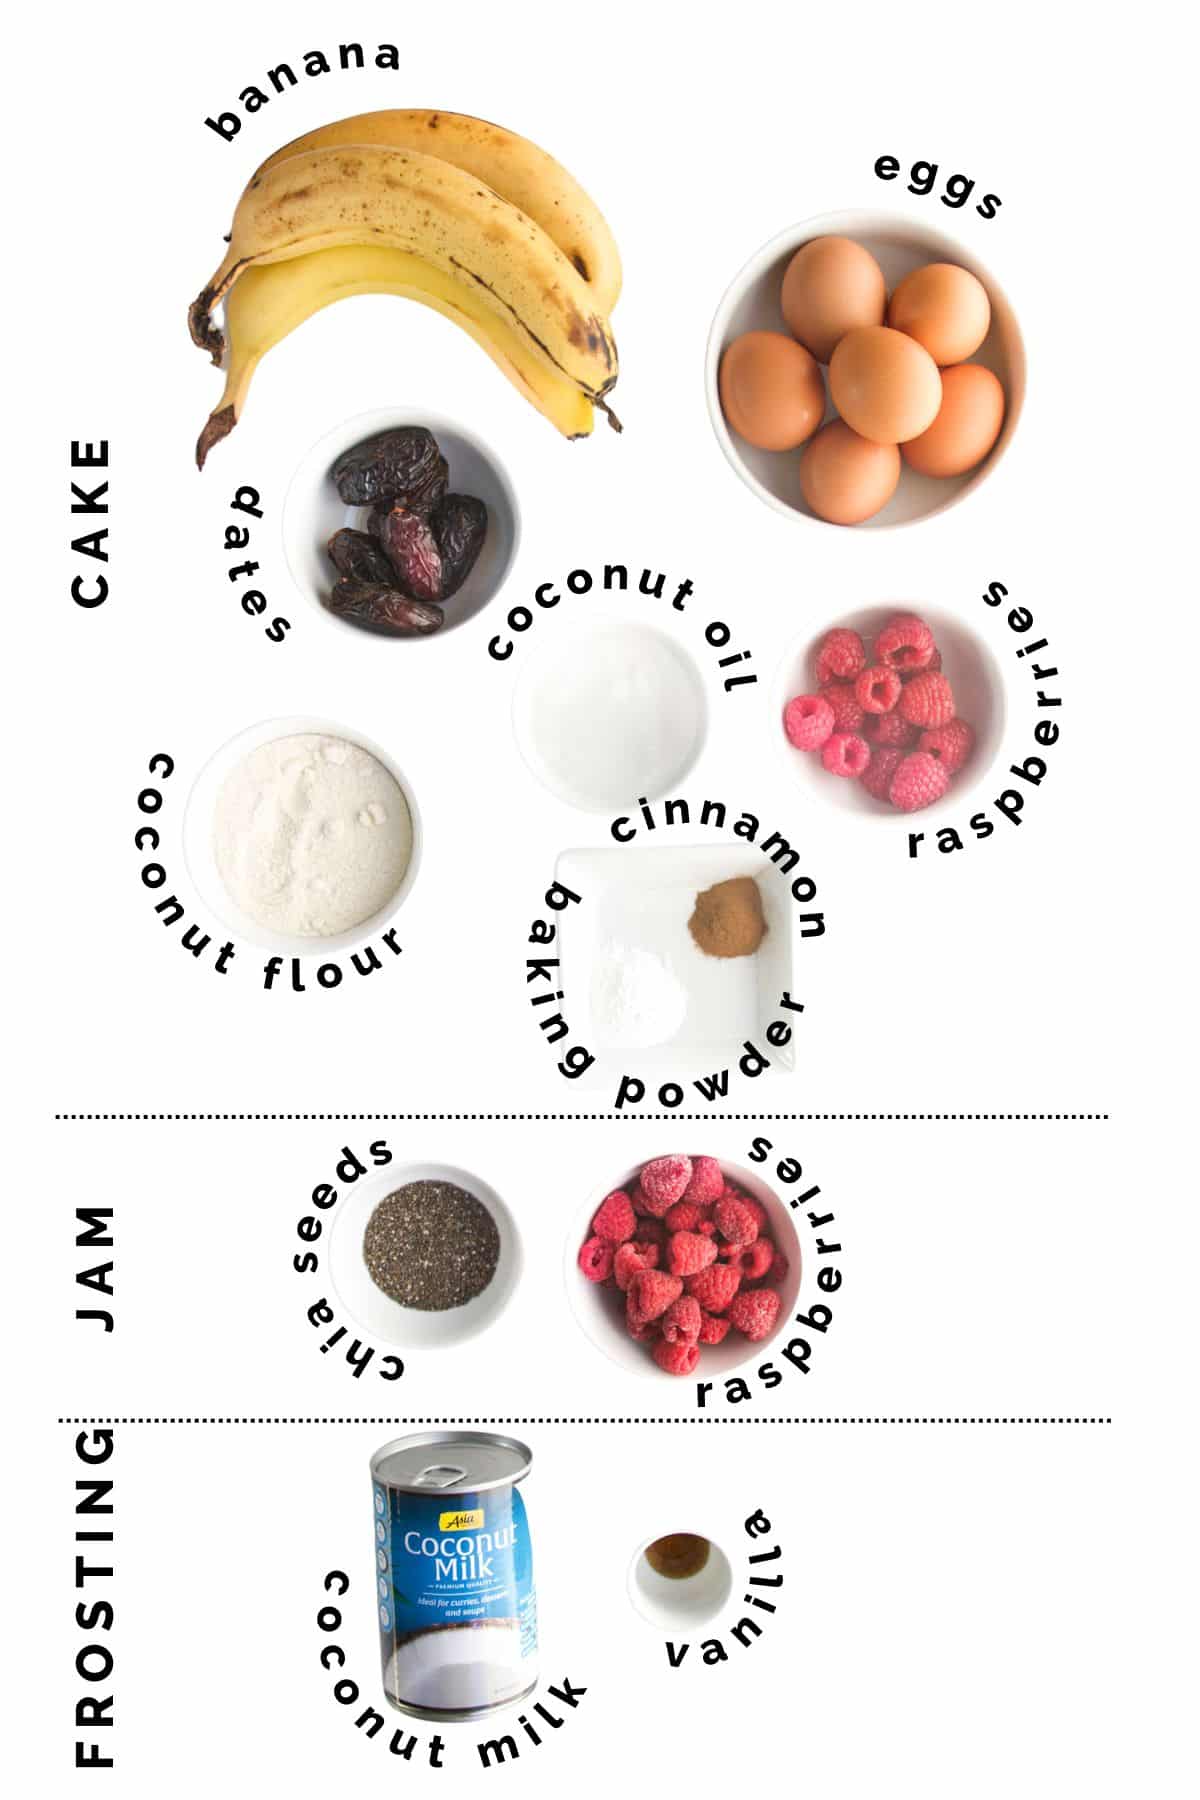
- Bananas are included in the cake for their natural sweetness, moist texture and binding properties. No substitute have been tested.
- Eggs are added to the cake to provide structure and moisture. No egg replacement has been tested and due to the amount of eggs, they may be difficult to replace.
- Dates are used as a natural sweetener. Again, no substitute has been tested.
- Coconut Oil provides moisture and richness. It could probably be replaced with butter or vegetable oil but neither has been tested.
- Coconut Flour, known for its high absorbency, is a gluten-free alternative to regular flour. Due to its moisture absorption properties, substituting it with alternative flours will not work with the current recipe, adjustments to the moisture levels would be necessary.
- Raspberries add a fruity flavour and their natural sweetness enhances the taste of the cake. You could replace it with other berries.
- Baking Powder helps make the cake rise and create a soft texture.
- Cinnamon is added for flavour, it can be skipped or substituted with another spice such as cardamom. Jam
- Frozen Raspberries are the base of the jam, you can use different berries if preferred.
- Chia Seeds act as a natural thickener, providing a spreadable consistency once the jam is cooled. Frosting
- Coconut Milk once chilled overnight can be transformed into a a dairy free alternative to whipped cream.
- Vanilla is added for sweetness and flavour.
Step By Step Instructions and Cooking Tips
This section features step-by-step photos for visual reference. The complete recipe can be found by scrolling to the recipe card at the bottom of this post.
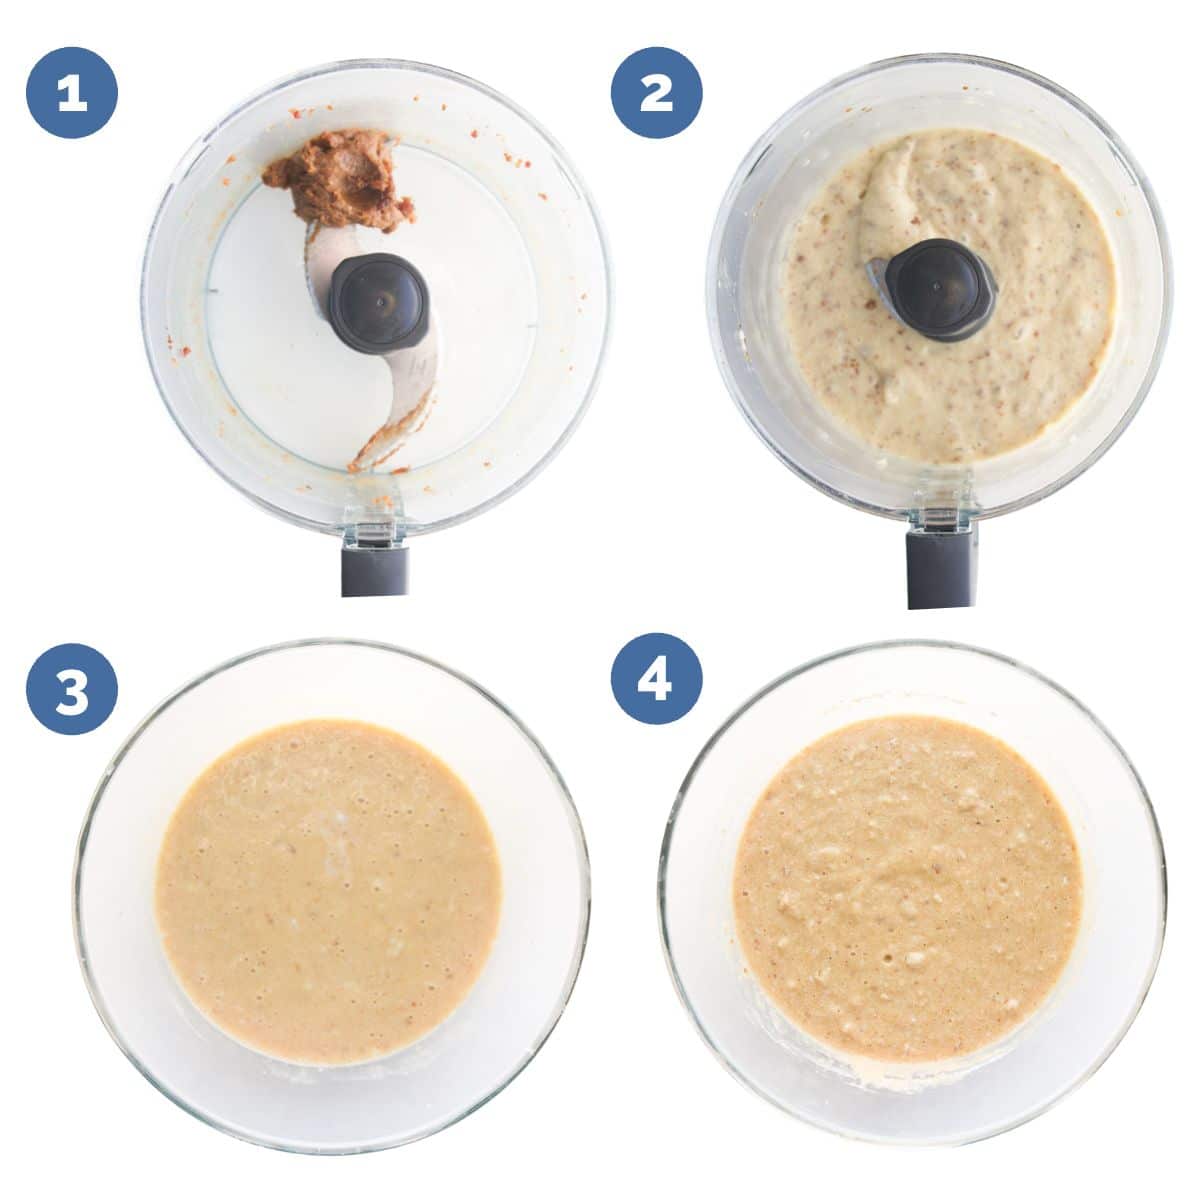
- Blend the dates in a food processor until broken down and clumped together to form a paste.
Tip - Ensure the dates are soft or they will not blend properly. If your dates are a little dry soak them in boiling water for a couple of minutes before blending. - Add the bananas and continue to blend until combined.
- Add the oil and eggs into a mixing bowl, along with the date and banana puree, and mix until combined.
More Info - You may be wondering why there are so many eggs. Coconut flour does not have gluten in it and eggs are needed to keep the product together. Eggs also help the cake rise and provide extra moisture. - Add the dry ingredients (coconut flour, baking powder and cinnamon) and stir until combined
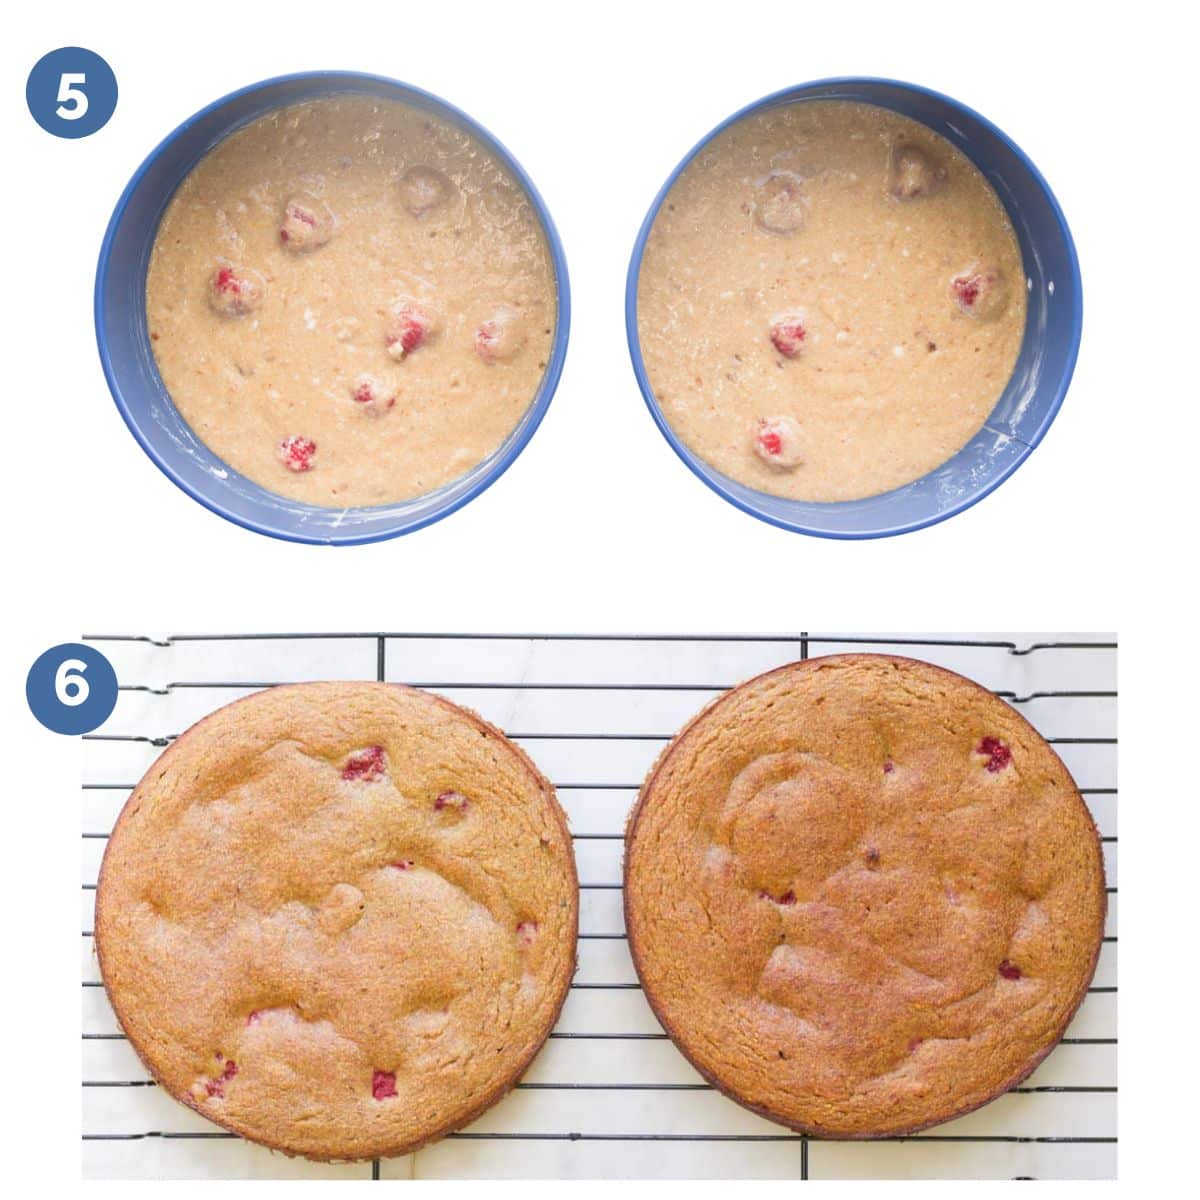
Tip - Allow the coconut flour to sit in the liquid mixture for 10 mins. This is to allow the coconut flour to absorb the liquid. You should notice that the mixture thickens in this time. - Pour mixture evenly into two greased and lined 7" pans
More Info - I have tested the recipe in 7" round pans (takes 50 mins) and 8" round pans (takes 45 mins). I do not have any timings for other pan sizes. The mixture should be split into two tins or it will not bake properly. I used springform pans.
Top Tips for Making Coconut Whipped Cream
Making coconut whipped cream isn't as simple as just opening cans of coconut milk/cream and whipping it up. There are certain things you should do to ensure you achieve the perfect consistency.
- Choose the right brand. Not all brands work well, make sure you buy full fat as reduced-fat won't work. I recommend giving the can of milk a shake and if you don't feel the liquid moving then this will probably work perfectly.
- Chill the coconut milk/coconut cream in the refrigerator overnight. This is a MUST to ensure the cream hardens if you skip this then it will be too soft and won't whip properly.
- Make ahead. You can make whipped coconut cream up to 4 hours before icing your cake, make sure to store it in the refrigerator and ice the cake just before serving.
- Sweetness If you wish for a sweeter frosting you can add a touch of powdered sugar or stevia.
I found this guide on how to make whipped coconut cream really useful if you wish to learn more.
Assembling the Cake
- Cool: Allow the cake layers to cool and the chia jam to thicken in the fridge.
- Layer: Place one cake layer on your cake stand or serving plate. Evenly cover with the chia jam and top with the second cake layer. Spread the coconut whipped cream frosting over the top and sides. Decorate as you wish.
Storage and Make-Ahead Instructions
If you wish to make this cake in advance you can make the cake layers ahead of time but you should not assemble until the day of the party. The coconut whipped cream should be added at the last minute.
- Cake Layers: You can make ahead and freeze the cake layers for up to a month. Let it thaw overnight in the refrigerator. Alternatively, you can make the cake layers up to two days in advance and store, covered, in the refrigerator. Normally I do not recommend storing cakes in the refrigerator but this is a moist cake and stores best refrigerated.
- Chia Jam: You can make the chia jam 2-3 days in advance and store in the refrigerator.
- Coconut Whipped Cream Frosting: Can be whipped and stored in the refrigerator for up to four hours before "icing" the cake.
Does it Make a Good Smash Cake?
Smash cake photos are the cutest and this is a great cake to use. I have been sent so many adorable photos of readers' babies captured with this first birthday cake. Some have added food colouring to the frosting, to match a theme, and others have left it white.
The cake is moist and easy for baby to grab handfuls of it and you are sure to capture the delight on their faces when they take their first bite!
What Others Are Saying...
- "I’m making this healthy first birthday cake AGAIN for my son’s second birthday. I just don’t think he needs all the processed sugar so this cake will probably work for me as long as possible! It’s delicious! Thank u"
- "The smash birthday cake was the show stopper of the party! Everybody liked it! Adults too! Superb"
- "Our one year old couldn’t believe her luck. Piece in both hands and more allowed the next day for breakfast! all the adults raved and licked their lips as well. Thank you"
Recipe FAQs
Due to coconut flour's moisture absorption properties, substituting it with alternative flours will not work with the current recipe, adjustments to the moisture levels would be necessary.
No, you can use any jam. I've just used chia jam as a healthier alternative.
Of course, the coconut whipped cream frosting is just a suggestion. You can use your favourite frosting. If you are looking for a healthy option a yogurt frosting is a good alternative.
A smash cake is a cake made for a baby's first birthday celebration. The main idea behind a smash cake is to allow the baby to freely explore and enjoy their first taste of cake by eating, smashing and making a mess with it. The tradition is a fun and memorable way to celebrate this significant milestone in a baby's life.
More Fruit Sweetened Recipes
Looking for more healthy kid recipes?Sign up for my free recipe newsletter to get new family friendly recipes in your inbox each week! Find me sharing more kid-friendly inspiration on Pinterest and Instagram.

Healthy First Birthday Cake
Equipment
- 2 x 7" (18cm) Baking Tins (Nonstick springform is preferable)
- Food Processor or High Speed Blender
Ingredients
Cake
- 6 Medjool Dates, Pitted
- 375g (3- 4) Ripe Bananas
- 6 Eggs
- 60ml (¼ cup) Coconut Oil, Melted (plus extra for greasing tins)
- 45g (½ cup) Coconut Flour
- ½ teaspoon Cinnamon
- 1 ½ teaspoon Baking Powder
- 65g (½ cup) Raspberries
Jam
- 110g (1 cup) Frozen Raspberries, defrosted
- 1 tablespoon Chia Seeds
- 1 tablespoon Warm Water
Frosting
- 1-2 400ml (14oz)Can Coconut Milk , chilled in the refrigerator overnight
- 3 Drops Vanilla Extract
Instructions
Cake
- Blend the dates in a food processor until broken down and clumped together to form a paste. Add the bananas and continue to blend until combined.
- Meanwhile, preheat the oven to 170C / 340F. Line and grease two 7-inch pans with some coconut oil.
- Transfer the banana date mixture to a large mixing bowl together with the eggs and oil. Carefully mix until combined. In a separate bowl mix together the coconut flour, baking powder and cinnamon. Add to the wet ingredient and stir through. Wait for 10 mins to allow the coconut flour to expand.
- Add the raspberries and gently stir through before pouring the mixture equally into the prepared cake pans.
- Bake, in the centre of the oven, for approx. 45 mins or until the cakes are baked through. To test for doneness, insert a toothpick into the centre of the cake. If it comes out clean, it is done. Allow cakes to cool for 10 minutes before removing from the tin. Place on a wire rack and allow the cakes to completely cool before assembling and frosting.
Chia Jam
- Heat the berries and chia seeds in a small saucepan over medium-high heat. Stir until the berries are heated through and begin to break down and bubble. Taste the mixture, if you feel it is too tart then you can add a sweetener of choice (e.g. a touch of maple syrup.)
- Remove from the heat and let cool, the jam will thicken as it cools. Transfer to a container and store in the refrigerator for at least one hour or until ready to assemble the cake.
Coconut Whipped Cream Frosting
- Scoop out the thick coconut cream from the top of the coconut milk can. Add to a large mixing bowl, along with the vanilla.
- Whisk until it resembles whipped cream. Store in the refrigerator until you are ready to assemble the cake.
Cake Assembly
- Place 1 cake layer on your cake stand or serving plate. Evenly cover the chia jam. Top with the 2nd layer and spread the coconut cream frosting over the top and sides. Decorate as you wish.
Video
Recipe Notes
Nutritional facts
This recipe was first published on October 15th, 2015. It has been updated to include extra information and process shots.



Anna says
This looks so good! Could I sub maple syrup for the pureed dates?
Amy says
Hi Anna, I think it would work but I would have to test it to be sure.
Felicia Lim says
I made this cake for my grandson 1st birthday who has never eaten a cake before. The joy seeing him eating and smashing the cake was very fulfilling. This is a very delicious and safe cake for the little ones especially for those mums trying to hold back sugar as long as possible. Really easy to make and coconut whipping cream enhanced the flavour. Thanks very much for this delicious cake
Amy says
Thank you so much Felicia, I'm so happy it was a success 🙂
Helen M says
The cake didn't stick to the toothpick 15mins earlier than said here. Is my cake not cooked? It's very moist.
Amy says
Hi Helen, I'm confused, did you take it out 15 mins early? It is a very moist cake.
Jess says
Hi Amy, do you think it would work if I doubled the recipe to make a four layer cake?
Amy says
Hi Jess, as long as you baked it in 4 pans it would work 🙂
Danielle says
Hi Amy
I’ve made this cake a few times for my sons birthday and it’s turned out great!
I’m hoping to do vanilla cupcakes this time around however can’t find a healthy frosting option and wonder if this coconut cream frosting will work piped onto cupcakes do you think?
Thank you!!
Amy says
Hi Danielle, I haven't tried piping it so can't say how long it would last. I have seen people pipe it though, like in this post https://detoxinista.com/easy-coconut-whipped-cream/
Heidi says
Hi, I’ve made this a few times and my son loves it! I was going to make it for his first birthday next week but have so much to do. Can I make it in advance and freeze it? Thanks!
Amy says
Hi Heidi, I'm so happy your son loves this cake. I haven't actually tested freezing this cake but I think it would freeze well (without the frosting). Amy
Caroline McGill says
This cake is awesome. I haven’t baked in 30 years. I made this twice for my one’s birthday. Everyone loved it. So easy to bake. And so tasty too!
Amy says
Thank you Caroline. I'm so happy the recipe was a success for you and that everyone enjoyed it. 🙂
Kirsi Bourget says
Hello
I am planning on doing this cake this weekend.
I was wondering if you could use strawberries instead of raspberries please?
Also do you think you could puree the strawberries and mix it to the battery that way instead of just adding them like this?
Thank you for your time.
Amy says
Hi Kirsi, Someone wrote to me saying they used chopped strawberry, which worked well. I'm not sure about pureeing them, I would worry the batter would be too wet.
Caroline McGill says
Oh and I made it with both raspberries and strawberry’s. Simples
Carleen says
Do you think this would work with greek yogurt or a flax egg instead of the eggs?
Amy says
Hi Carleen, as there are quite a few egg in this recipe without testing it I really can't say, sorry.
Mara says
Can I sub butter for the coconut oil?
Amy says
Hi Mara, I haven't tested it but I think it should work. 🙂