
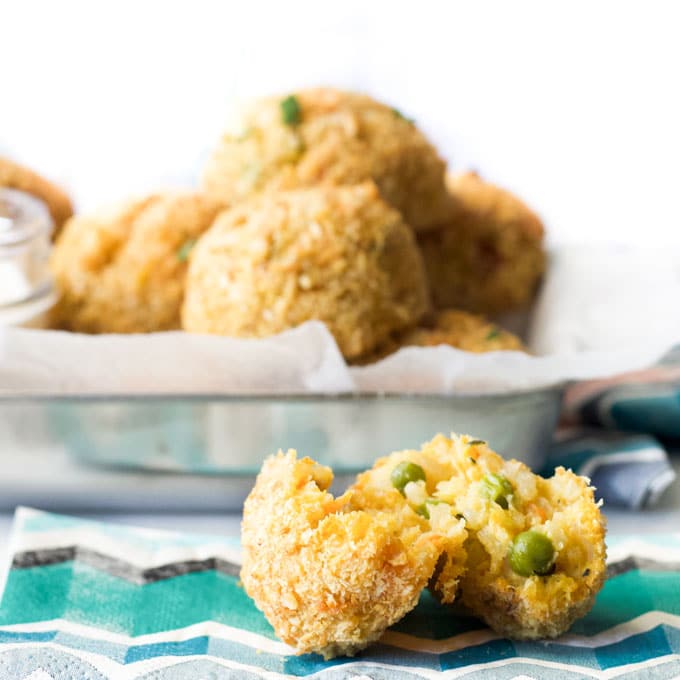
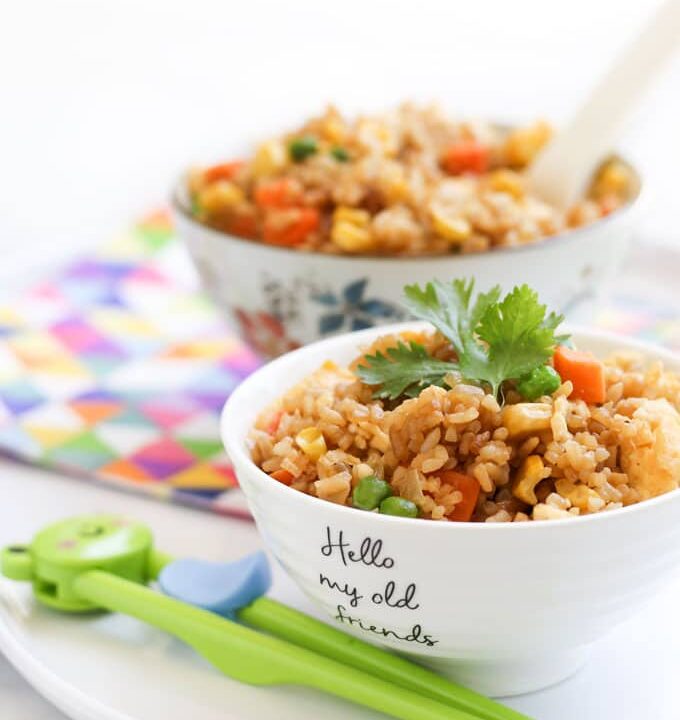
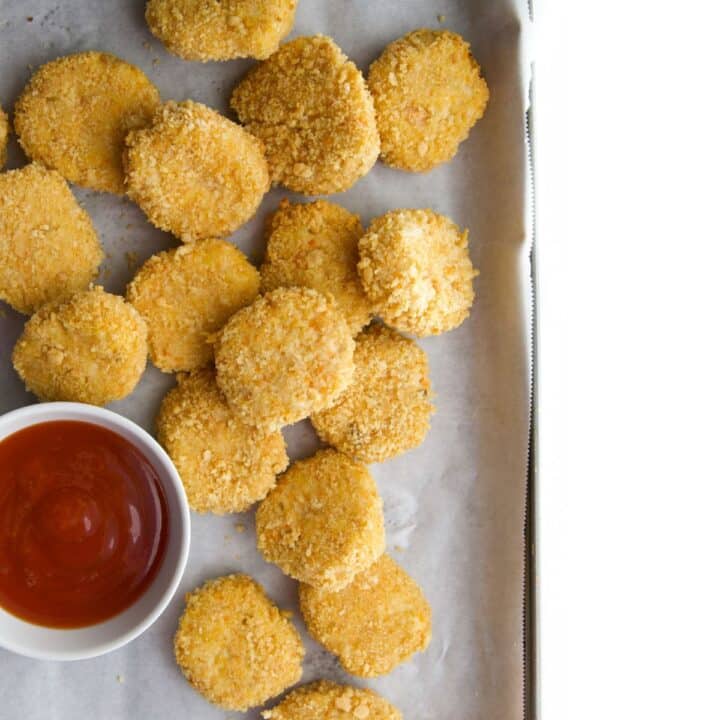
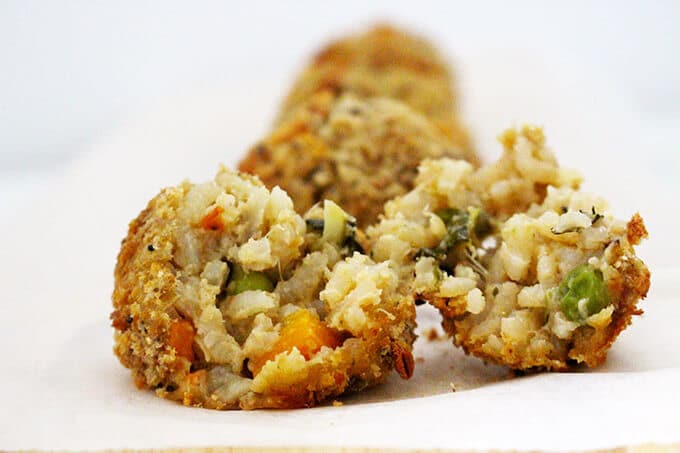
Baked Arancini is a healthier twist on the classic friend Arancini. Use your favourite risotto recipe or use up leftover risotto to make these delicious baked risotto balls.
Baked arancini is not only a tasty appetiser for adults, but it's also a fantastic finger food for babies and toddlers.
Serving rice in a finger food format can make it easier and more appealing for little ones to eat, while also reducing the mess. If you are interested in other kid-friendly finger foods, be sure to check out this recipe for cheese and tomato quinoa balls or curried lentil bake, which offers other delicious options for making messy foods more manageable for little ones.
Jump to:
More reasons to LOVE Baked Arancini
- Healthier: This baked version is a healthier alternative to deep-fried arancini.
- Great Way to Use Leftovers: I love creating a completely different meal with leftovers.
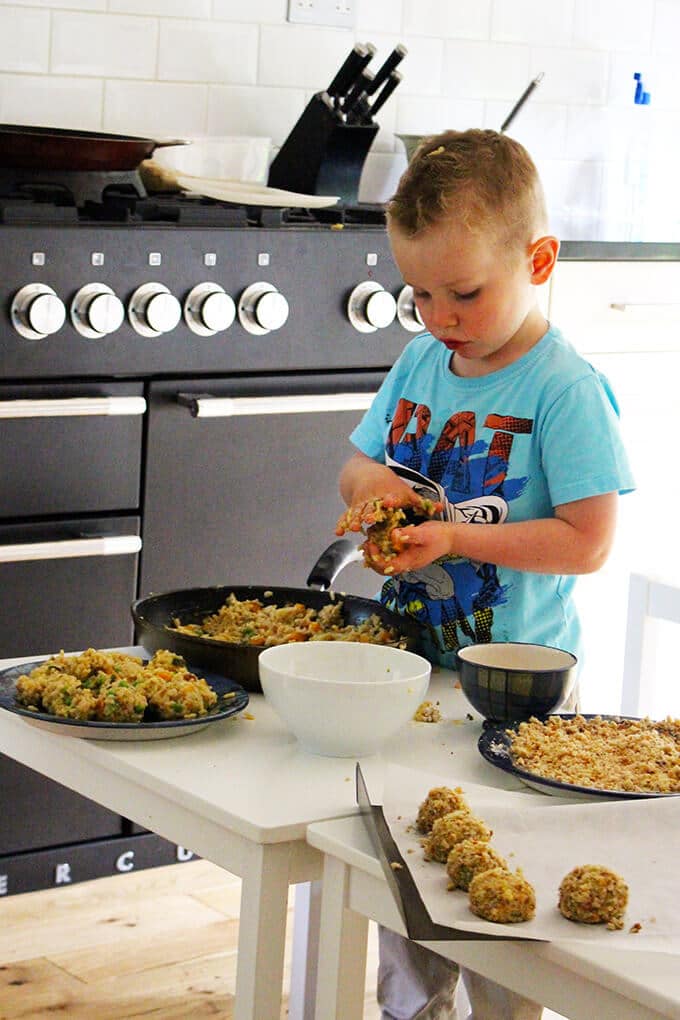
- Kids in the Kitchen: This is a great recipe to get your kids involved in the kitchen. Little kids can have a go at forming the balls and older kids can coat and dip them.
Step By Step Instructions
Baked risotto balls are relatively quick and easy to put together (if you have already made and chilled the risotto). I would usually make this recipe with leftover risotto rather than making the risotto, cooling it and then preparing the balls on the same day.
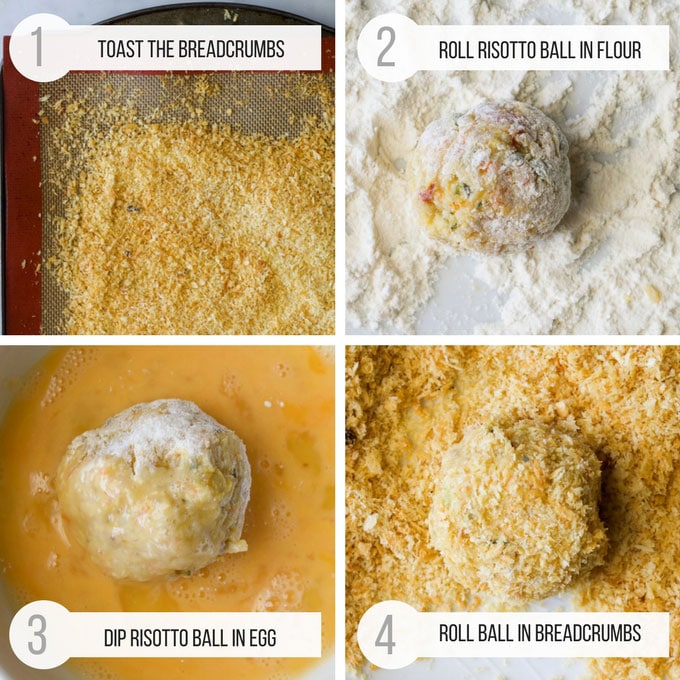
- TOAST BREADCRUMBS: This is an optional step. Spray your breadcrumbs with oil and pop them in the oven for 5-10 mins before you coat your balls. Although not necessary for taste, doing this will give your breadcrumbs a head start in the browning process and will make your arancini more visually like the fried version.
- ROLL LEFTOVER RISOTTO INTO BALLS: I used roughly one and a half tablespoons of rice to form each ball. You can make the balls bigger or smaller but the cooking time will change, as will the amount of coating needed.
- ROLL BALL IN FLOUR & DIP IN EGG: Roll each ball in the flour and then dip in the egg mixture
- ROLL BALL IN TOASTED BREADCRUMBS: Finally coat with the breadcrumbs
- BAKE: Place each ball on a prepared baking tray, lightly spray with oil and cook until golden and heated throughout (around 20 mins)
Expert Tips
- RISOTTO RECIPE - Any risotto recipe can be used so if you have a recipe you love, then use that one. Just make sure your risotto is made with an Italian variety of rice that has the correct starches to produce a creamy texture when cooked. Arborio, Vialone Nano and Carnaroli are the most common varieties. Also, if you are serving babies/toddlers use a low-sodium recipe.
- RISOTTO TEXTURE - If you find your risotto is a little wet, and you are worried that your balls won't hold their shape when baked, simply make a test ball and let it sit for a couple of minutes to see if it starts to flatten. If this is the case add some breadcrumbs, a little at a time, until the right consistency.
- GOLDEN ARANCINI - Baking can result in pale-looking arancini. To combat this, pre-toast your breadcrumbs. This will give them a head start in browning and will result in your balls looking more like the fried version.
- PANKO BREADCRUMBS: I have made baked arancini with a range of breadcrumbs. Fresh, dried and panko. My personal favourite, although not very Italian, is Panko breadcrumbs. It is hard to achieve the same delicious crunchy shell, that frying achieves when you are baking but panko gives the best results.
Recipe Variations
- ADD CHEESE - I didn't include a cheese centre in these arancini balls because I wanted to make them a little more baby / toddler-friendly (less added sodium).
However, you can easily add cheese to yours if you like. Add a small cube of mozzarella, or your desired cheese, into the centre of each risotto ball. Make sure to fully cover the rice around the cheese to stop it from oozing out while baking. - ADD SEASONINGS - No salt was added to the breadcrumbs, again to reduce sodium levels for little kids. If making for adults then you may wish to add around ½ teaspoon of salt to the breadcrumbs. Alternatively, you could mix in some complimentary spices (depending on what risotto recipe you use)
Recipe FAQs
Arancini are risotto balls coated in breadcrumbs and deep-fried, they are usually stuffed with ragu, mozzarella and peas. This adaptation is baked, instead of fried, and has no extra stuffing.
You can make these risotto balls ahead of time. Form the balls and return them to the refrigerator until you are ready to bake that day. Once cooked they should not be stored or re-heated as the rice will have already been re-heated once
Yes, these can be introduced from around 6 months +. However, it is important to note that rice has low levels of arsenic and infants are particularly vulnerable to the harmful effects of arsenic exposure. Thus, limiting their consumption of rice and rice products to 2-3 times a week is important.
Many risotto recipes can be high in sodium so use a baby-friendly risotto recipe that is made with homemade/low-sodium stock.
This recipe also contains egg and wheat which are both common allergens. They should be safely introduced separately before offering these balls.
More Rice Recipes

Looking for more healthy kid recipes?Sign up for my free recipe newsletter to get new family friendly recipes in your inbox each week! Find me sharing more kid-friendly inspiration on Pinterest and Instagram.

Baked Arancini
Ingredients
- 600g (3 cups) Cooked and Chilled Risotto *SEE NOTE 1
- 2 Eggs, beaten
- 35g (¼ cup) Flour
- 80g (1½ cups) Panko Breadcrumbs *SEE NOTE 2
Instructions
- Pre heat oven to 180c / 350F and line baking tray with baking paper / silicon mat.
- OPTIONAL (to achieve a more golden look to your balls) Place breadcrumbs on a baking tray, spray with oil and bake on the top shelf for around 5 - 10 mins (until golden)
- Place flour in a dish, beaten egg in another and the breadcrumbs on a flat plate.
- Roll risotto into balls (mine were approx. 1 ½ tablespoon each)
- Roll each ball into the flour then dip into the egg and finally coat with the breadcrumbs.
- Place on baking tray, lightly spray with olive oil and cook until golden and heated though out. (Approx. 20 mins)
Monimoni
Just made this with my 9 year old and everyone loved them. Toddler is happy with them and 9yo wants to make anther batch this week with fillings.
Maria Solano
Is the fat content per ball?
Amy
Hi Maria, yes it is per ball when the mixture makes 12 balls. Please note that the nutritional information is a rough guide only, calculated using an online nutrition calculator. Values will also change depending on your recipe for the risotto.
Lola
How many does this make roughly
Amy
Hi Lola, it makes around 12 balls.
Hana M
This has to be my favourite recipe on your site. Kids love them as do the adults. I’ve always used your vegetable risotto recipe to make them. Do you have any other risotto recipes I could try?
Amy
Thanks Hana, comments like this always make me happy 🙂 I only have the vegetable risotto or this slow cooker risotto recipe on the site. Maybe it is time I add some more...
Amy
Second time making this & absolutely love it. Husband approved & toddlers approved too. Thank you.
Ed
Worked really well! Thanks
Amy
Great to hear, thank you 🙂
Tracy
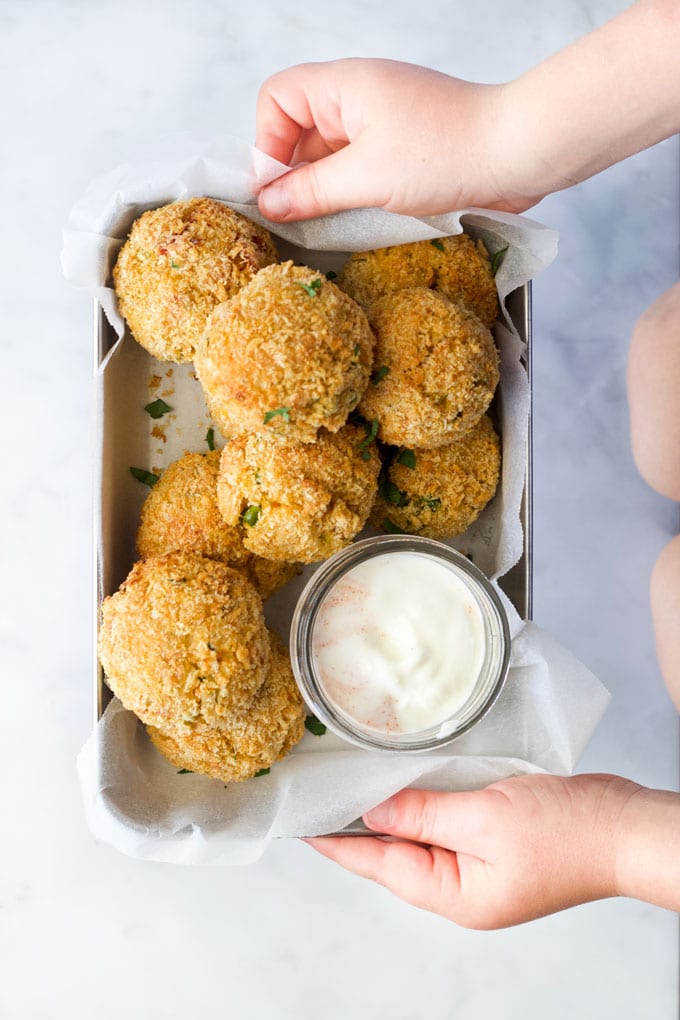
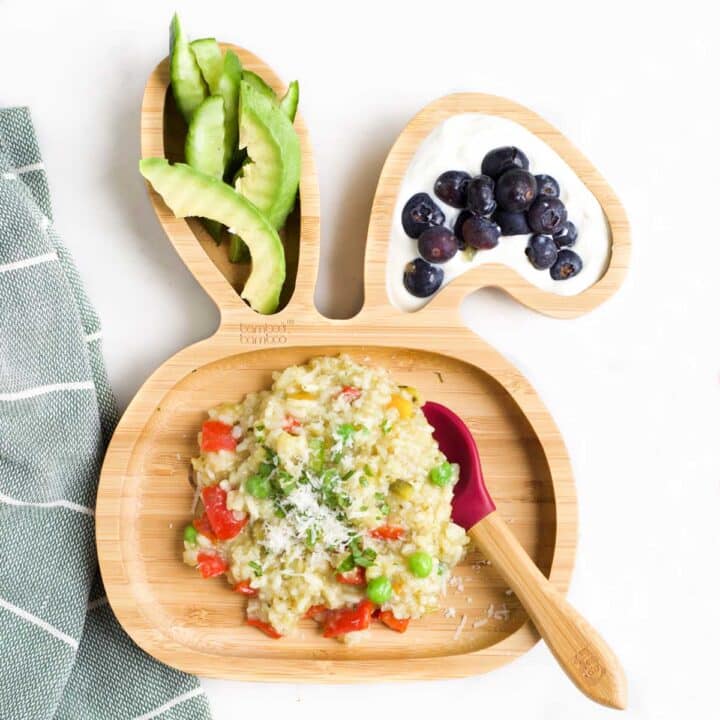
Hi, just wondering what the dip in the picture is? Thanks
Amy
Hi Tracy. I believe this is a dip that I make often using greek yoghurt, lime juice, smoked paprika and salt (no salt for baby). I just add the lime, smoked paprika and salt to taste.
Tracy
Lovely, thank you.
Audrey DeSouza
This is a delicious alternative to frying. Used brown rice that gets the risotto consistency. Parmesan and bread crumbs added to the rice to bind. Did it the Sicilian way with meat peas ricotta hard boiled eggs. Wow. !!! Never fry again.
Amy
So happy you liked it, Audrey 🙂
Aus Working Mummy
These look delicious and I’m planning to make them tonight. I note that you don’t advise freezing the Arancini. Could you tell me how long they keep in the fridge? I am thinking of making these for a friend who has Judy had a baby as a quick dinner/snack. Thank you!!
Amy
I'm so sorry for the late response, Audrey. You should only reheat rice once, so if you are using leftover risotto then I wouldn't recommend storing them. If using freshly cooked risotto, I'd refrigerate and eat within one day.
Marianne
I have always fried but never baked arancini, but have been making them since I first had them in the train station in Milan. That was 2005.. Never seen them before, nor heard of them. Are they as good baked as they are fried?
Amy
Hi Marianne, I think that really depends on the person. Fried is delicious but baking makes it healthier.
Tracey Davis
This recipe is amazing. My son said the risotto balls were better than he had at a restaurant recently.
So easy to make to.
Amy
Thanks Tracey!I'm so happy your son approves 🙂
Danielle
These were delicious. I used left over pumpkin and mushroom risotto and cooked them in the air fryer. 3yo and 1yo loved helping make these too.
Thankyou for the recipe
Amy
Perfect! Thank you, I love to hear kids getting involved in the kitchen 🙂
Winet
Can these be frozen?
Amy
Hi Winet, I don't recommend freezing these. The texture is not great after refreezing. Also, (if using leftover rice) you would be reheating to make the balls and then reheating again after freezing, which is not recommended.
Marianne
I freeze arancini all of the time. Great for a quickie appetizer. You say, "refreeze" Where is the first freeze?
Amy
Hi Marianne, sorry I meant to freeze. Great to know you freeze arancini with no issues 🙂
Stewart
Perfect recipe for leftover Risi e Bisi (or Asparagi). Love that it’s baked not fried!
STEPH
Hi! What could i use to replace the egg?
Thanks
Amy
Hi Steph, if the risotto is sticky enough you may get away with just missing out the egg. If not, you could try milk or yoghurt or a flax egg. Hope it works