
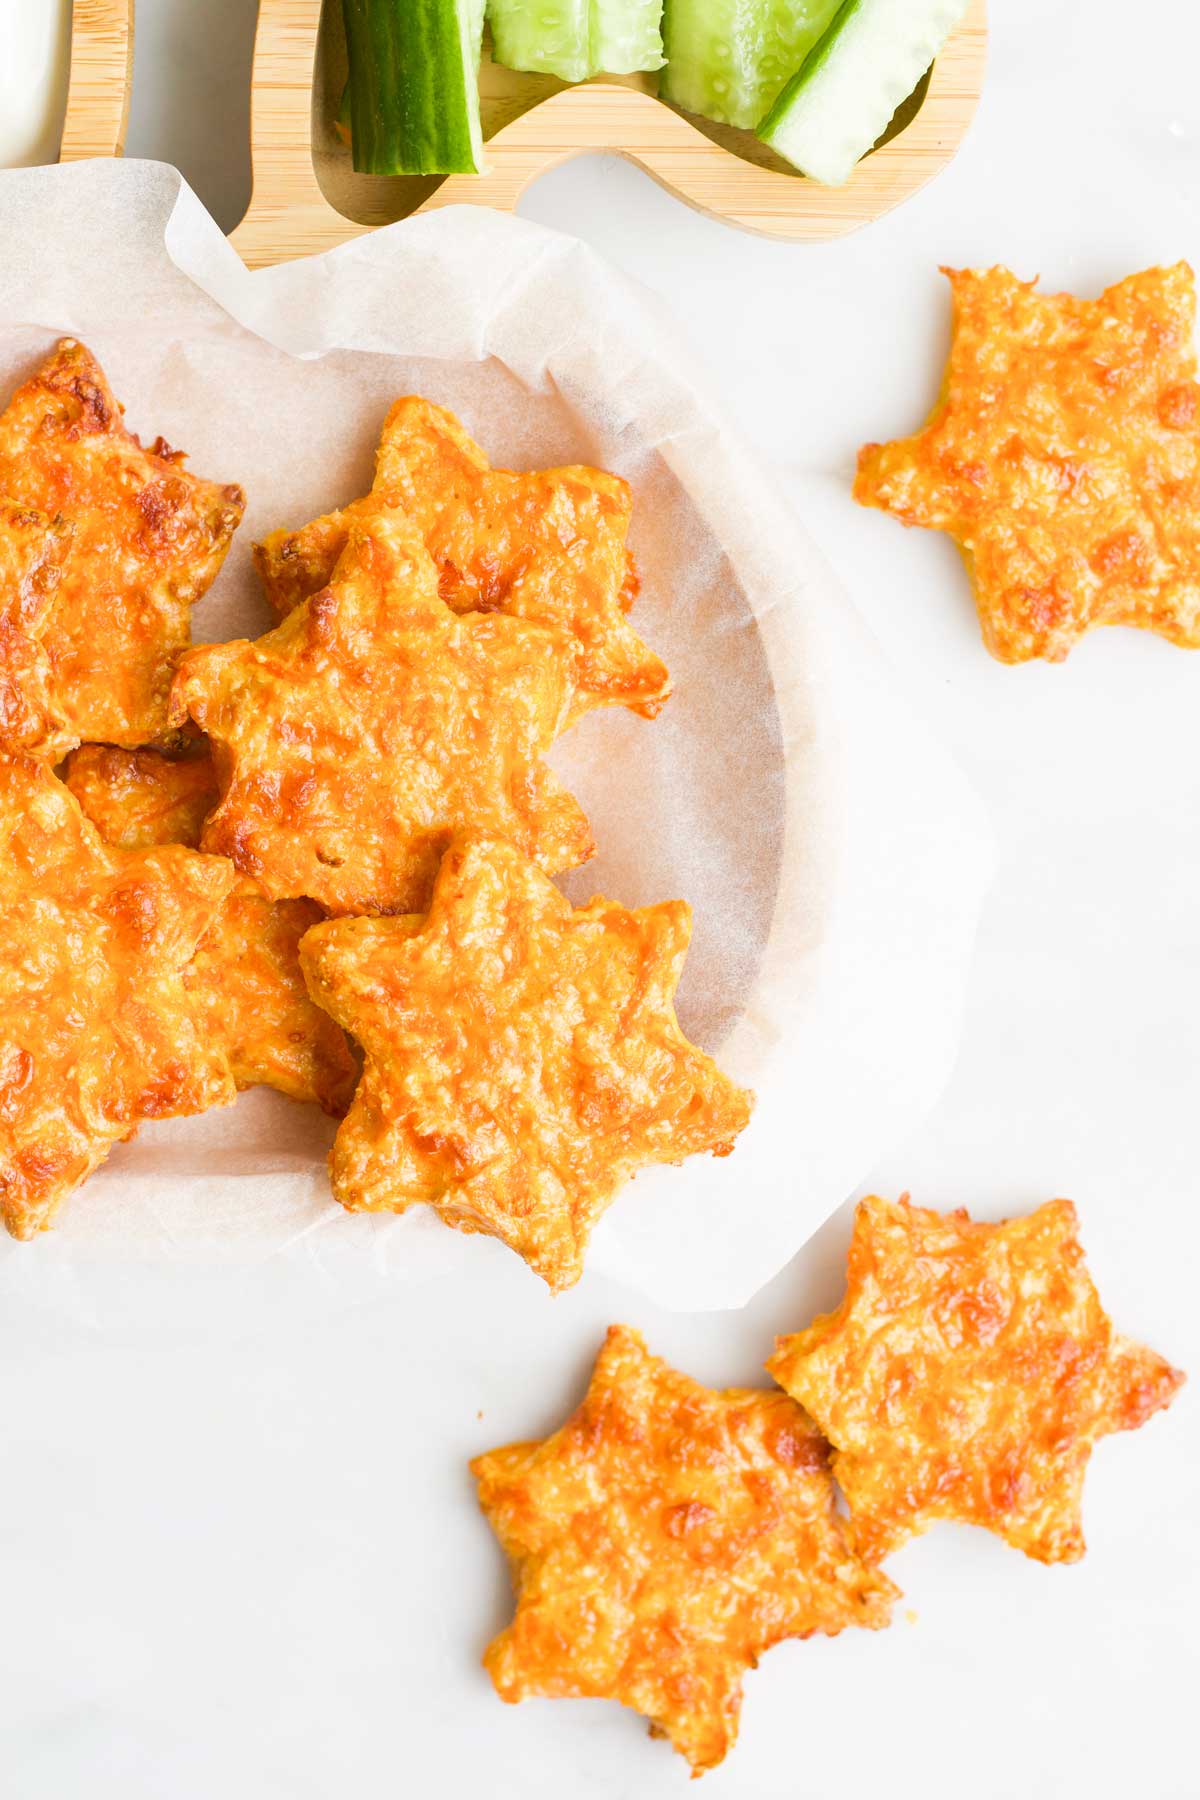
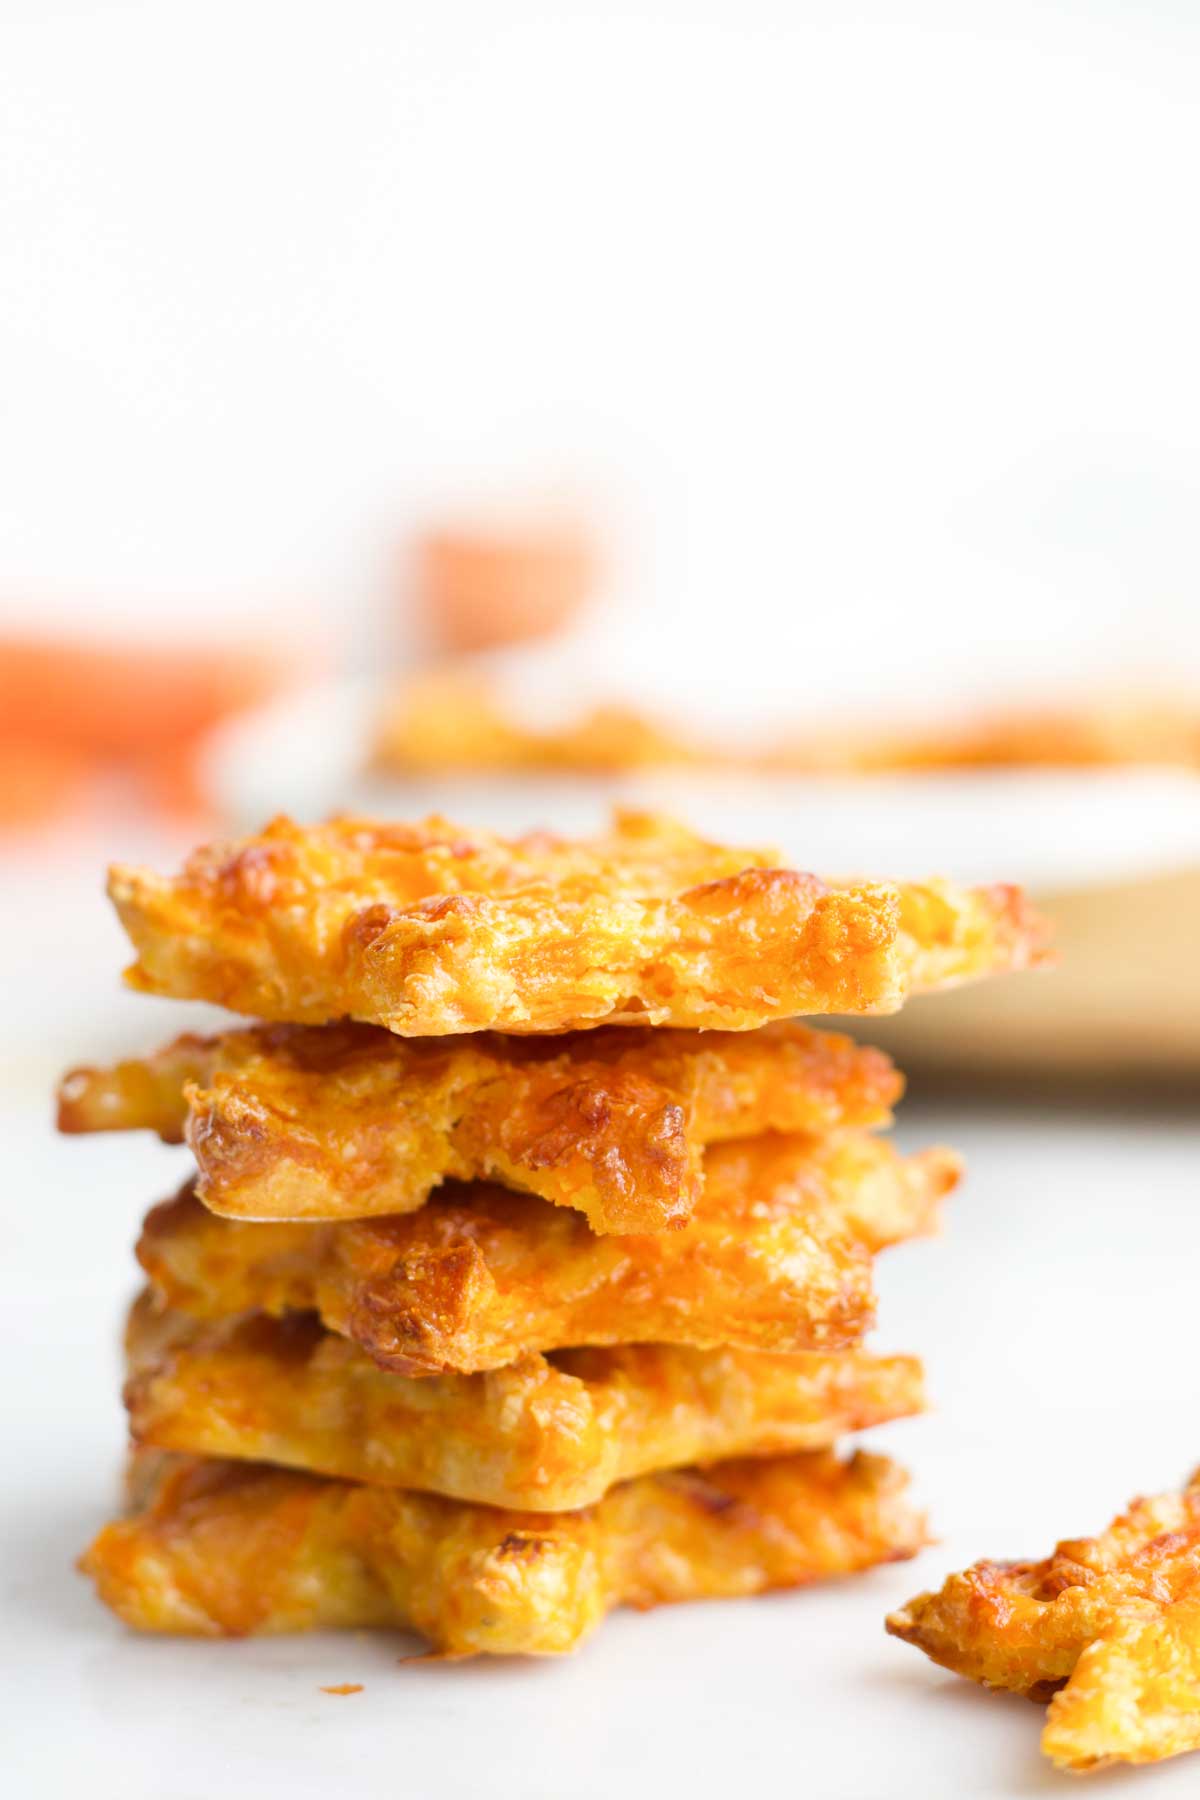
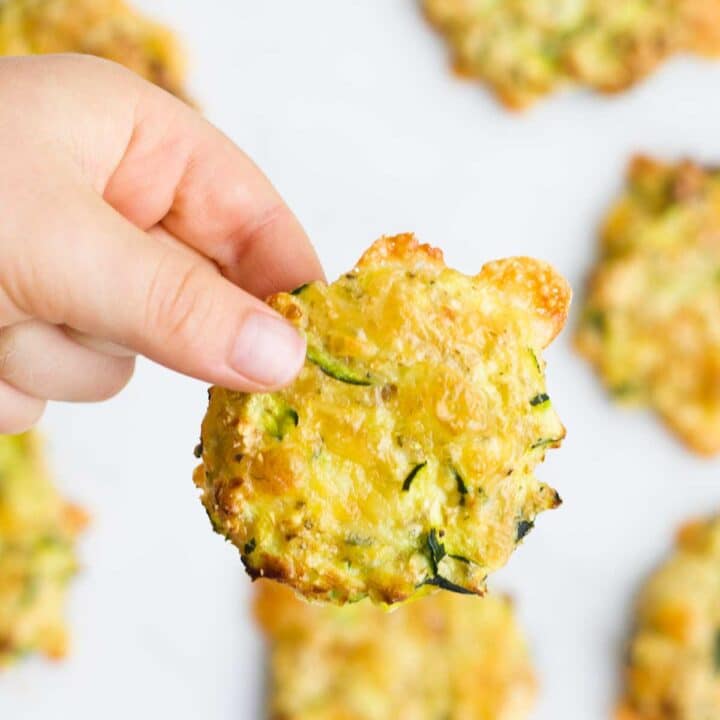
Carrot Star Bites are made with only 4 ingredients and are a great toddler snack or lunchbox filler.
Jump to:
Reasons to Love This Recipe
- Balanced - this simple snack contains veggies, carbs, protein and dairy to keep little tummies satisfied.
- Vegetable Exposure - allows kids to see the versatility of vegetables are and how they can taste different when cooked and prepared in various ways.
- Freezer Friendly - meaning you can always have some to hand.
- Lunchbox Friendly - great when you are looking for healthy lunchbox ideas
Ingredient Information
For the full recipe, with ingredient amounts, scroll to the recipe card at the bottom of the post.
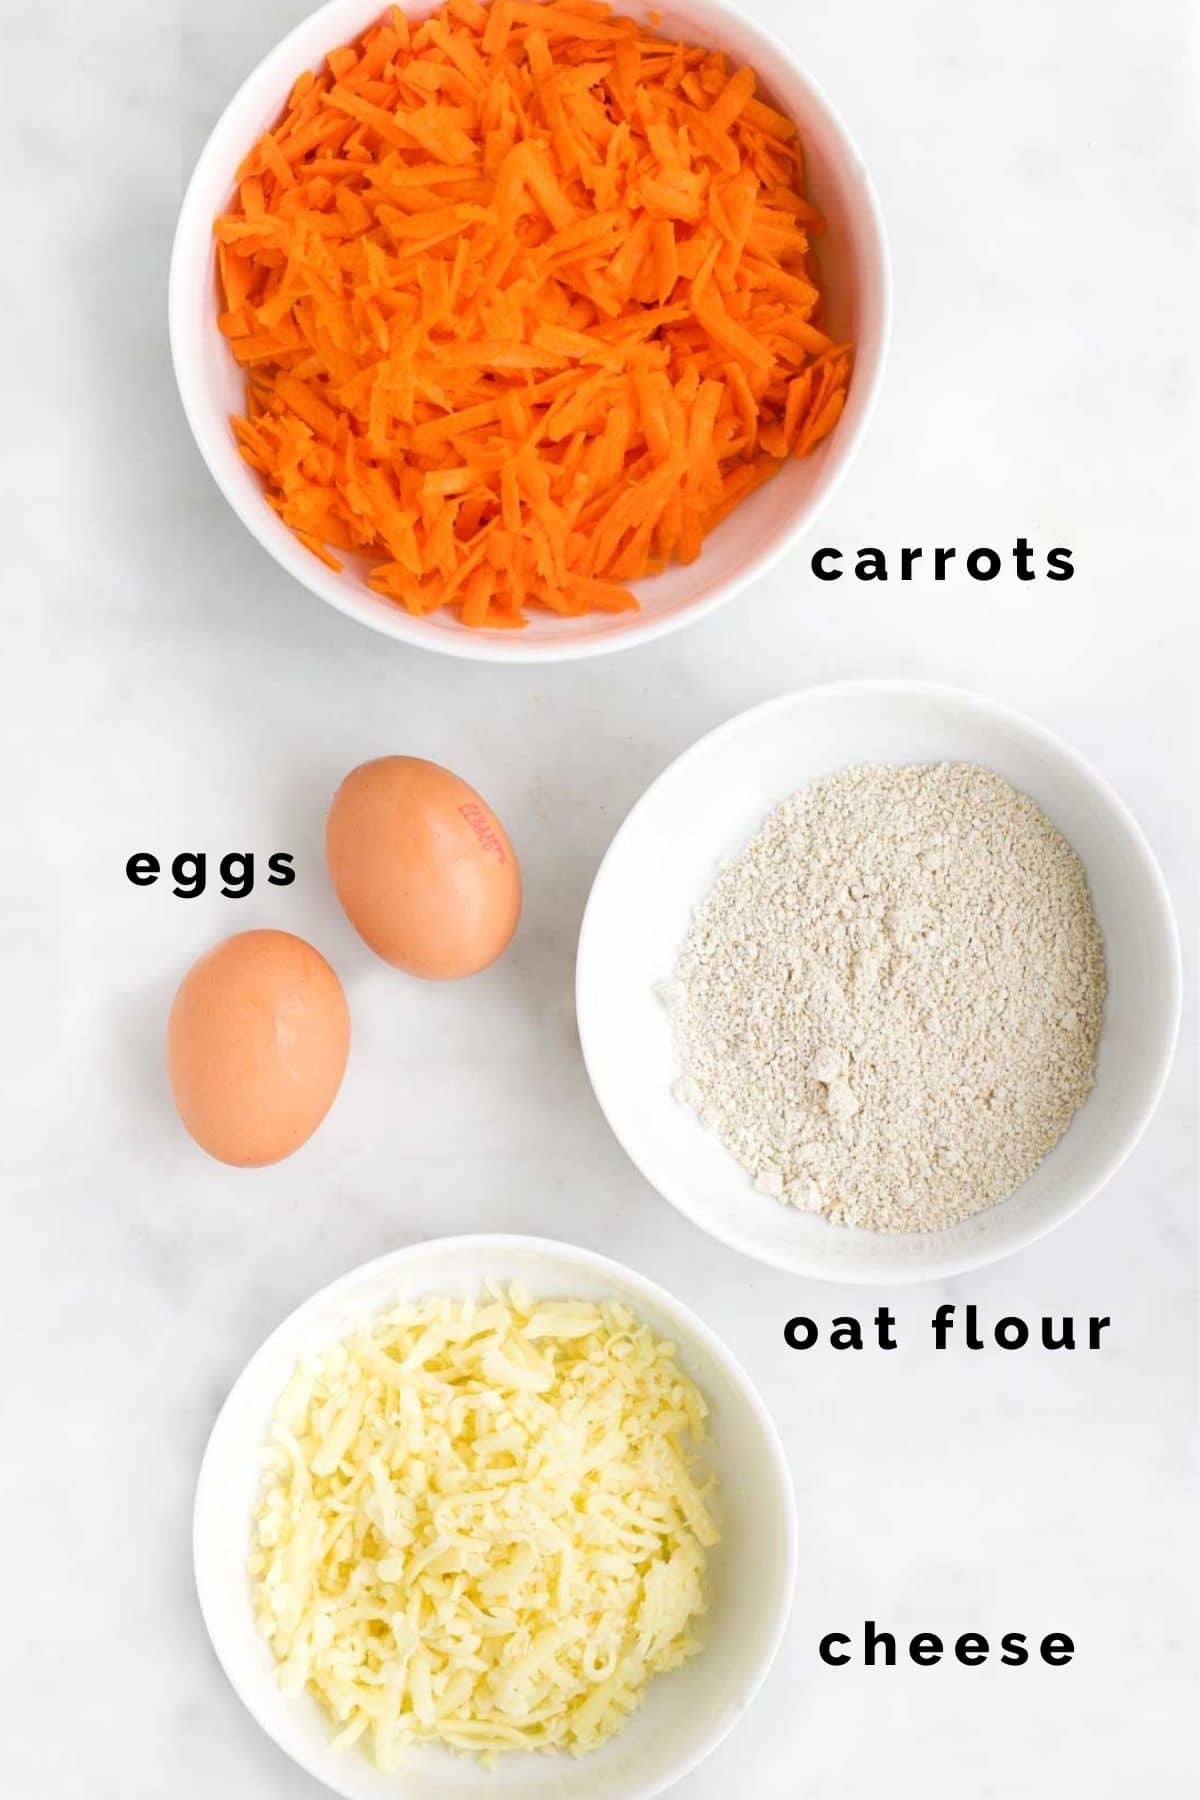
- Grated carrots
- Grated cheese - a good melting cheese such as cheddar or mozzarella works well (or a mix).
- Oat Flour - You can easily make oat flour by blending / processing rolled oats. Alternatively you can replace with other flours such as all-purpose or almond.
- Eggs
Step By Step Instructions and Photos
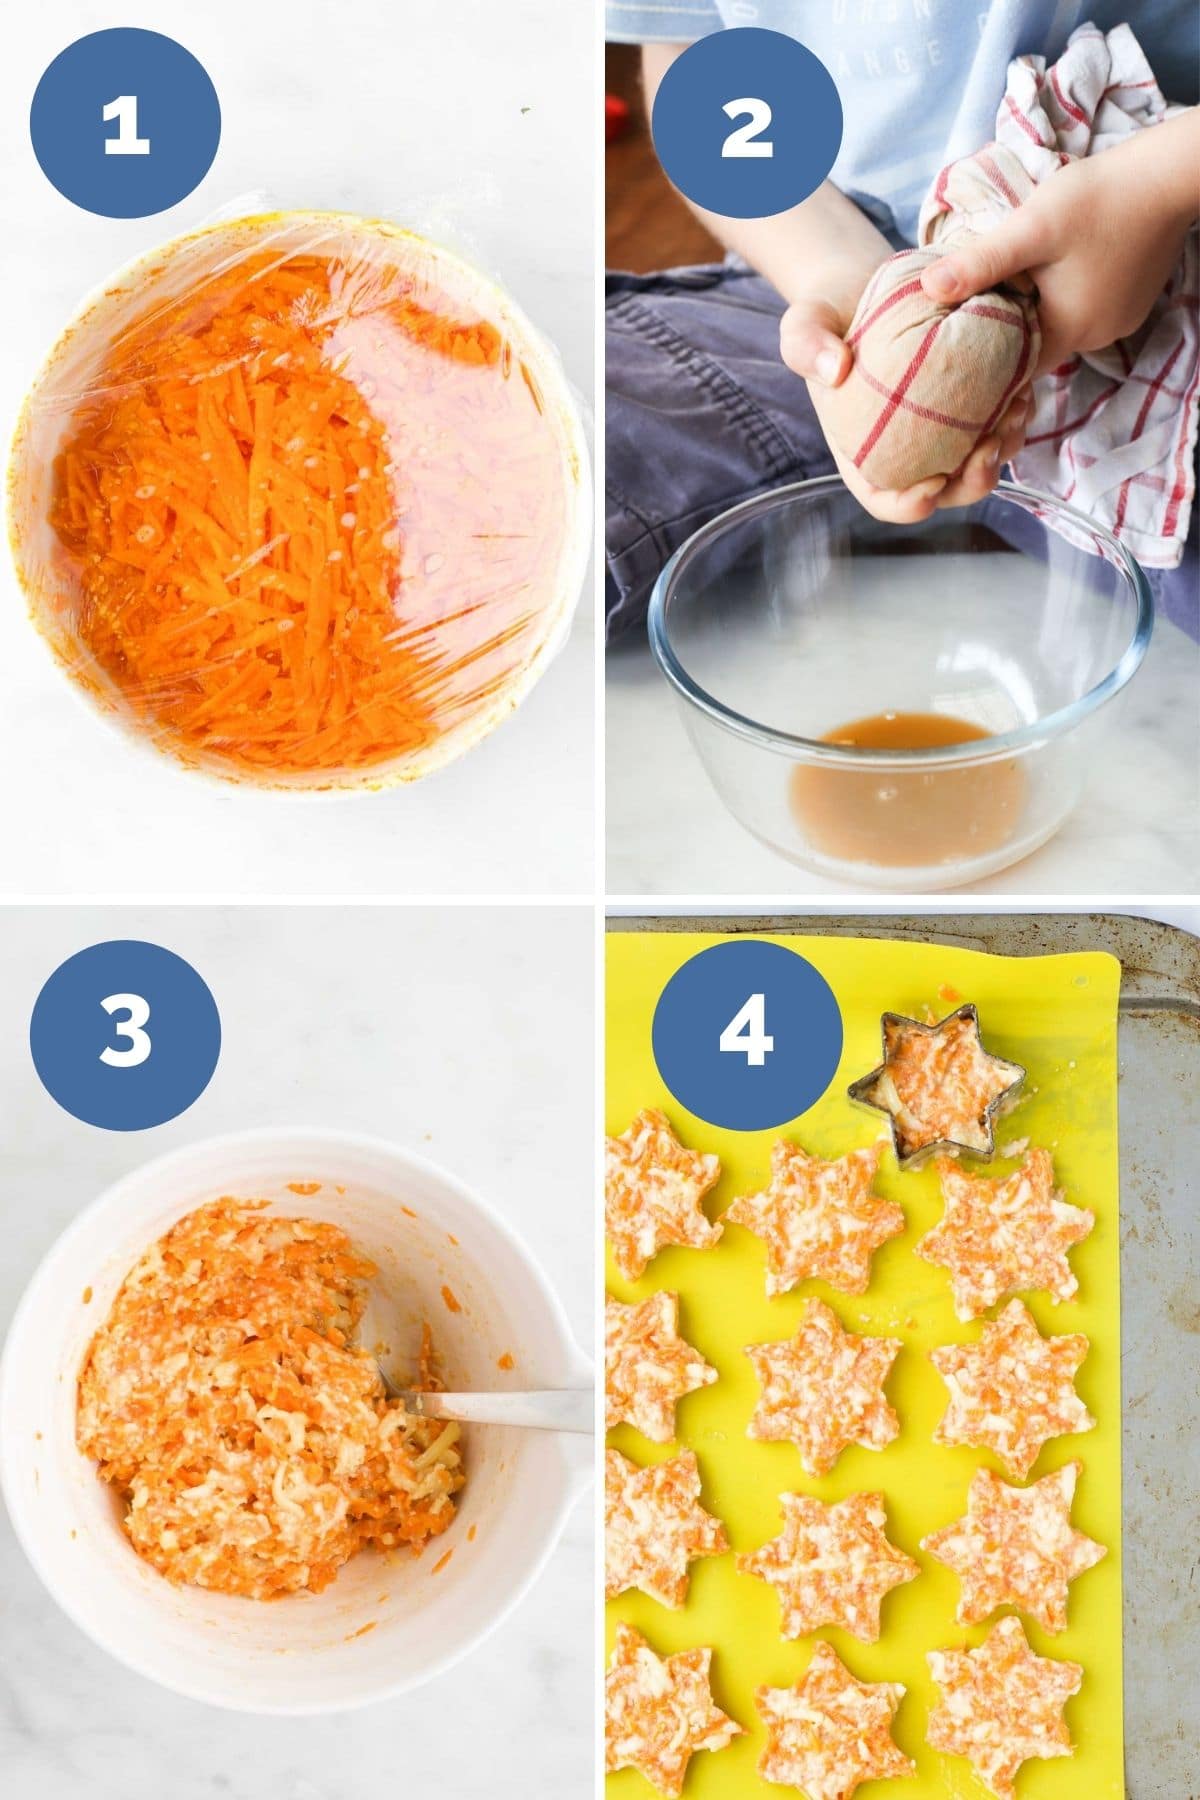
- In a small mixing bowl, mix the grated carrot with water, cover and microwave on high for 3 mins. Alternatively, you can steam or boil.
- Drain the carrots, place them on a clean cloth / absorbent paper and squeeze out the excess liquid.
- Place the carrots back in the bowl and mix with the remaining ingredients.
- Prepare a baking sheet with parchment paper or a silicon baking sheet. Form star shapes of the mixture using a cookie cutter, the mixture should be approx. 0.5cm (¼ inch) thick. (You can make any shape you wish)
- Bake for approx. 13-15 mins (until crispy on the sides)
Storage Instructions
- REFRIGERATE: Store these carrot star bites in an airtight container for up to 2 days. Note: The stars will soften in texture when cold
- FREEZE: Allow to cool and freeze on a baking sheet. Once hard transfer the stars to an airtight container or ziplock bag and freeze for up to 2 months.
You may also like...
Looking for more healthy kid recipes?Sign up for my free recipe newsletter to get new family friendly recipes in your inbox each week! Find me sharing more kid-friendly inspiration on Pinterest and Instagram.

Carrot Stars
Made with only 4 ingredients this savoury snack is perfect for kids of all ages.
Prep Time: 5 minutes
Cook Time: 16 minutes
Total Time: 21 minutes
Serves:14 stars
Hover over "serves" value to reveal recipe scaler
Ingredients
- 200g (1½ packed cups) Carrots Grated
- 125ml (½ cup) Water
- 70g (½ cup) Grated Cheese
- 2 Eggs
- 4 tbsp (15ml tbsps) Oat flour
Instructions
- Pre heat oven to 180C / 350F / Gas 4 and prepare a baking sheet with parchment paper or a silicon baking sheet
- Mix the carrot and water in a bowl, cover and microwave on high for 3 mins
- Drain the carrots and then place them on a clean cloth / absorbent paper and squeeze out the liquid. (You need to get the carrots quite dry for the recipe to work)
- Place the carrots back in the bowl and mix with the remaining ingredients.
- Using a cookie cutter, form star shapes of the mixture straight onto the prepared baking sheet. Make each star around ½cm / ¼inch thick.
- Bake for approx. 13 mins (until crispy on the sides)
Video
Recipe Notes
Cheese: You can use any good melting cheese such as cheddar, mozzarella or tasty. Or you can use a mix.
Flour: Oat flour can easily be made by blending / processing oats until a flour consistency. Alternatively you can replace with another flour (such as all-purpose or almond)
Cooking carrots without a microwave: Bring ½ cup water to boil, add the grated carrots and cook for 3 minutes. Alternatively, steam until soft.
I made 14 carrot stars, this will vary depending on the size of the cookie cutter.
Nutritional Information is a ROUGH guide only, calculated using an online nutrition calculator.
*Adapted from a recipe for Carrot Taco Shells by Carine Claudepierre of Sweet as Honey.
Nutritional facts
Calories: 44kcal | Carbohydrates: 3g | Protein: 2g | Fat: 2g | Saturated Fat: 1g | Cholesterol: 29mg | Sodium: 51mg | Potassium: 67mg | Fiber: 1g | Sugar: 1g | Vitamin A: 2470IU | Vitamin C: 0.8mg | Calcium: 45mg | Iron: 0.3mg
*This post was first published Nov 2014, it has been updated to include process shots, new images and more recipe information.
Laura
We have an egg allergy in our house. Could I use a regular egg replacement in this recipe?
Amy
Hi laura, I have never tried or worked with egg replacements so can't help you with this, sorry. If you try it please let me know how it goes 🙂
Ashley
I subbed egg for banana and they turned out great.
Amy
Good to hear Ashley! Do they taste sweet?
Katie
Very yummy.....I added coriander. .. i just love carrot and coriander....not sure how biscuity they were but they were fantastic...also added to a salad with toasted carraway seeds and monted yogurt....thanks x
Amy
OH I love coriander in everything! I must add some the next time I make them. Love your salad idea too! Thanks!
carine
Hi Amy, What a lovely blog you have! I absolutely love what you did with my taco shell original recipe. I may try this for my 3 years old soon 🙂 thanks for linking to my blog as well !
Amy
Thank you Carine, it is a great recipe and I make both your taco shells and these a lot. Thanks for your comment 🙂
Jennifer
Can you make these with all purpose flour or would the consistence change too much?
Amy
Hi Jennifer, I received a message from someone who made them with both all purpose flour and oat flour. She said they were crunchier with the all purpose flour and tasted great. Hope you enjoy them 🙂
Jordan
I'm always looking for ways to get my extremely picky eater to eat, and get all the important nutrients he needs. I hide veggies in everything and this is just genius! He absolutely loves them. I'm making my second batch as I write this. I plan on making up a lot of these for our Disneyland trip in a couple of weeks. Keep the kiddo fueled and healthy!
Amy
I'm so glad they were a success and thanks for taking the time to let me know. Enjoy Disneyland!
Carmen Gibson
Hi I have just recently found you on facebook and are looking forward to trying your recipes. I made the carrot stars and my 2.5 year old who is fussy and won't eat carrot ATE 3 !!! he loved them we call them cheesy biscuits ( the mere mention of a carrot could be fatal , lol )
I look forward to trying all your recipes
Amy
Thanks Carmen! I'm s glad they were a success and thank you for taking the time to tell me!
Cherie davies
Hi, have you tried them subbing the oat flour with a different flour to make them gluten free? Really would love to try them. However I don't eat oats. Thanks
Amy
Hi Cherie, I haven't tried it with any other flours, sorry.
Lori
Bob's Redmill makes a gluten-free oat.
Saira
Hi, in response to the question regarding substituting oatflour, I only used self raising Doves Farm gluten free flour and they were delicious. I have made them twice now. I haven't tried it yet but I reckon the carrots could be swapped with potatoes or sweet potatoes, or any root vegetable.
Amy
Love the idea of switching the root vegetable. I've made them with zucchini and they were sooo tasty! Will post recipe soon but basically the same as this one switching out the carrot for zucchini.
Tara
I made these and they look great, however they turned out more omelet like than I was expecting. Are they supposed to be crunchy like a cracker? I'm certain I followed the amounts of each ingredient as specified.....
Thanks!
Amy
Hi Tara, thanks for your comment and for trying the recipe. These aren't that crunchy and don't have the texture of a cracker. They are hard enough to pick up but are quite soft inside. Did you make them quite thick? If you make them thinner they should be crispier. ??
Amy
My (vegetable hating) girls LOVED these (and so did I). I made a few stars but found it much quicker to just make rounds. They have been great for snacking on but haven't last long. This is the first recipe I've tried but have had a little look and plans to make a few more. Thanks for the ideas.
Amy
Thanks for commenting and your positive feedback Amy. So glad you and your girls loved them. It is lovely to read that you like the blog and please do tell me how any other recipes go!
Ann
Hi
Thank you for the recipe, I made them and they turned beautifully. However, what is the secret to make then into star shapes? I tried with a cookie cutter but the dough was so sticky I could not keep the shape?
Many thanks
Amy
Hi Ann, thanks for your comment 🙂 I used a cookie cutter too. I pushed the mixture into the shape and then pushed down in the corners when removing the cutter. It took a couple of attempts to get the hang of it. Hope you manage next time!
Ann
Thanks Amy, I will definitely do them again, star shaped or not! 🙂
Simone
Love these! Brilliant idea and the taco idea is great too 🙂
Amy
Thanks Simone 🙂
Corina
I love the look of these. My little girl loves star shapes so maybe I will be able to get her to eat a savoury biscuit if I try these!
Amy
Thanks Corina! Let me know if it works! You will then end up cutting everything into stars 🙂
Charlotte Oates
These are so cute, I bet my boys would love them!
Amy
Thanks Charlotte, they go pretty quickly when I make them 🙂
Tracey
I'll need to give this a try as I usually just make my own oat flour! I love the photo with the little hand, so cute! I'll have to try to snap a similar one of my son, such a clever idea.
Kristel
This récipe can go to the freezer ?
Amy
Hi Kristel, yes they can be frozen 🙂